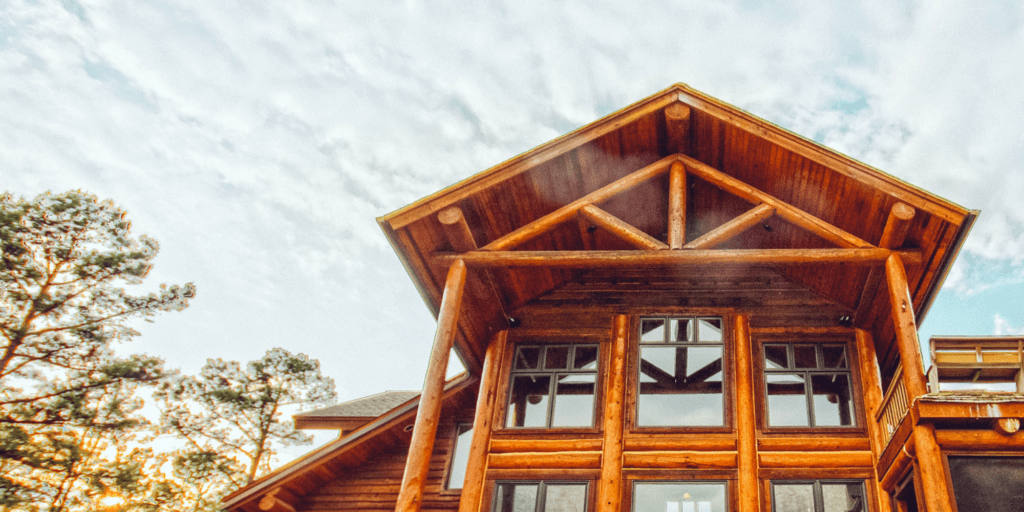
So, you did a stellar job of sealing cracks and checks in your log home. Hooray! Now, a couple of years later, you’re noticing that some of the caulk has cracked. After all that hard work? Ugh. So, what do you need to do to fix cracked caulk? Keep reading for all the details.
Why does caulk crack anyhow?
On most log homes, a handful of those logs will undergo extreme movement. This movement is a part of what makes a log a log. Moderate movement is normal, but the occasional maverick log can randomly and unpredictably twist, shrink or warp in response to moisture changes (like the first time the heat is turned on that winter), moving more than any sealant can possibly handle. When this extreme movement occurs, it will cause the sealant to fail either cohesively or adhesively. Here’s how to do repairs.
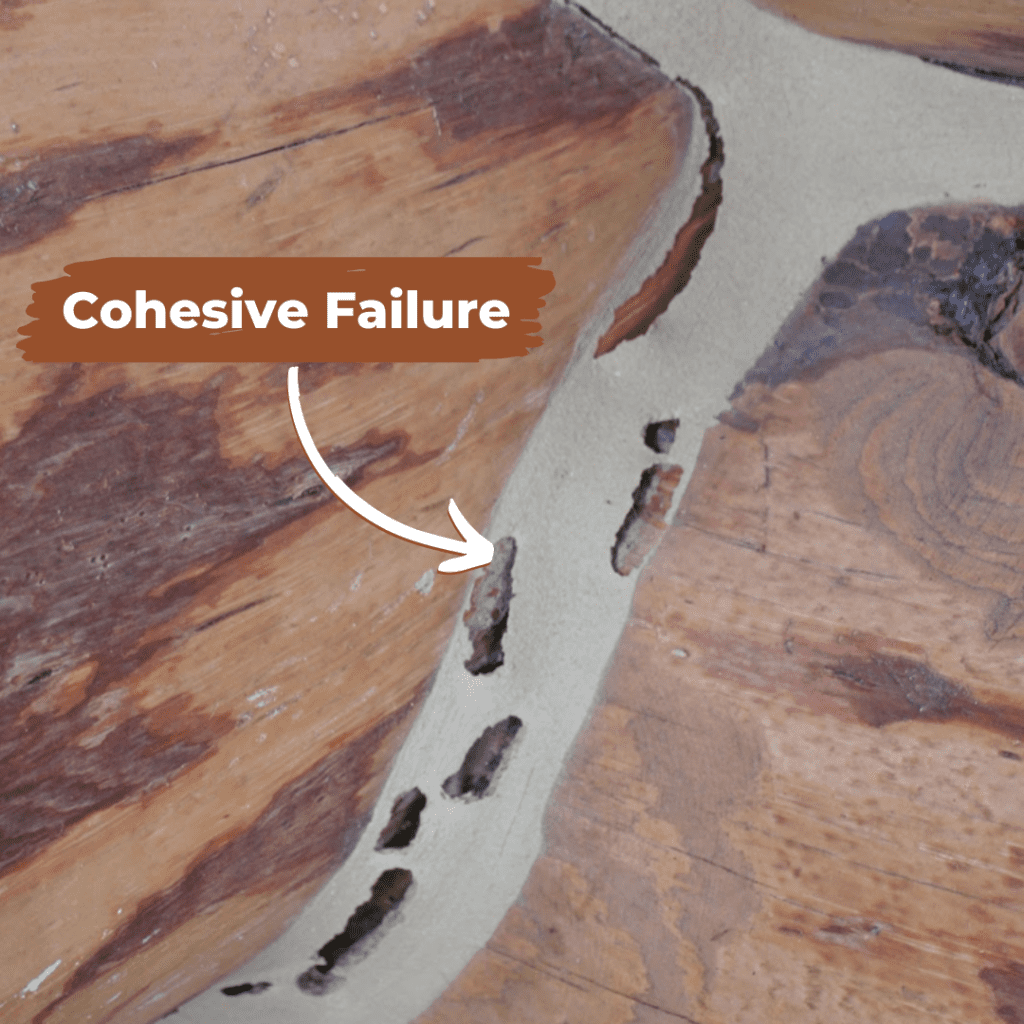
Cohesive failure
This is where the sealant splits apart down the middle of the joint. There’s still caulk sticking to the sides of the joint. Repairing cohesive failure is pretty simple:
Relieve the pressure by taking a razor blade to finish the job. (Sounds silly, but this is necessary for the repair to work properly.)
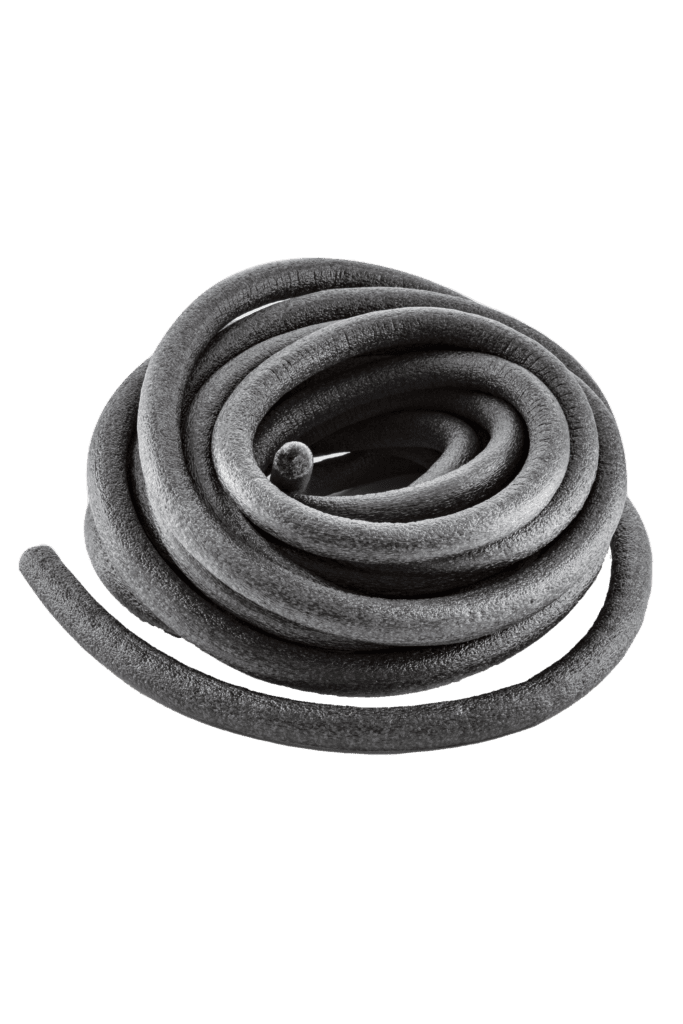
Insert backer rd behind the caulk, if there isn’t some there already.
Clean the surfaces to remove dust and other surface contaminants.
Apply more sealant right over top. You can only do this if the product you’re using is compatible with whatever’s already in there. With Sashco’s products, this is no problem. If you used silicone, you’ll have to remove it all. Boo.(Moral of the story: don’t use silicone on log homes.
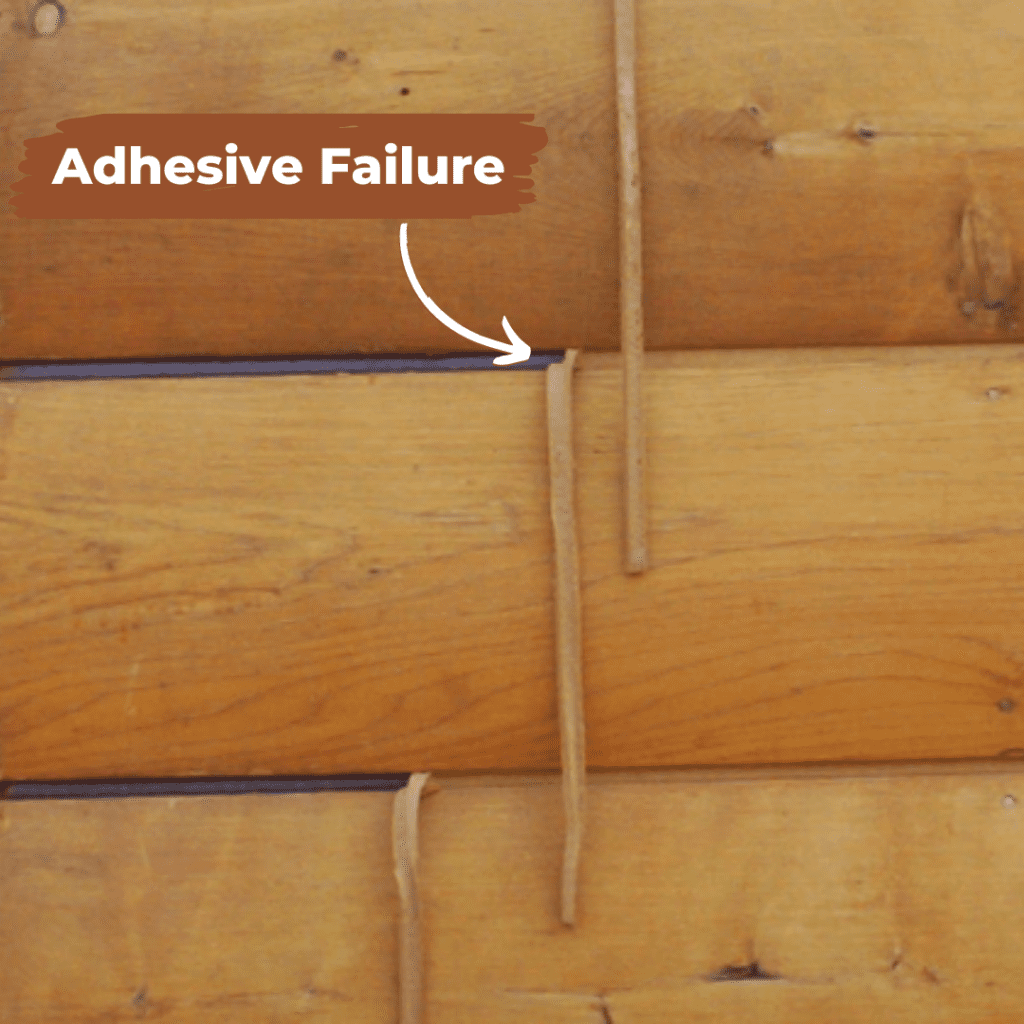
Adhesive failure
This is when the sealant pulls away from the edge of the logs. In this case, a bit more investigation is necessary. Adhesive failure can be either due to movement or because of an incompatibility between the stain or clear coat used on the logs and the caulking. If it’s only due to movement, here’s the fix:
Remove the sealant completely. You’ll have to cut it out entirely.
Insert backer rod or another bond breaker behind the caulk or chinking, if one is not already there.
Clean the joint, especially at the edges where the new product will be sticking. Make sure there are no loose wood fibers or peeling stains or paints. It may mean you need to break out the sand paper or Dremel® tool. (Power tools. Argh.)
Apply more caulking or chinking over top. Smooth it out, just like before.
If the failure is due to an incompatibility between the stain/clear coat on the wood, you’ll have to do some more extensive work to get the new caulking or chinking to stick:
Remove what’s in there now.
Sand down the edges of the joints to remove the stain/clear coat.
Clean with a degreaser of some kind (Formula 409® and the like do a good job).
OPTIONAL (and best): Stain just those areas with a compatible product.
Insert backer rod or a bond breaker, if one isn’t already there.
Apply more caulking and chinking, smoothing as before.
Looking for tips on log home care and maintenance? Check out our blog for more tips and information that will help you preserve your dream log home.
Log Blog
Explore inspiration, learn about our products and get tips from the pros over at the Log Blog!
What do you get when you combine a roofing contractor and a sealant manufacturer for a chimney repair project (apart from much time spent arguing over who gets to use the rad tools)? An expert example of tuckpointing a chimney.
Recently, Sashco president Les Burch and Sashco team members Sabrina and Randy helped Shane Guerra, the owner of Synergy Property Solutions, and his team, repair a chimney. Shane used Mor-Flexx, a latex acrylic caulk designed specifically for the chimney repairs. Mor-Flexx is ideal for use on mortar between stucco, concrete, bricks, and stone, or stucco repairs.
A recent post on a popular contractor locating service website asked this question: “Why are contractors so bad at calling people back?” He posted that 70% of the contractors he had contacted failed to call him back. Time for an uncomfortable confession: Sashco fields this same question multiple times every week. We hear, “You gave me the names of these contractors, but none of them are calling me back. Why?” Having more calls than you know what to do with is a great “problem” to have. So, how can you ensure that you respond to every legit call? Maybe it’s time to consider the help of a call service to handle incoming calls and scheduling. We are talking about the pros and cons and how to know if hiring a call service is right for your business.
Yes! You’ve chosen your stain, done all the prep, plus secondary prep, and you’ve blocked out that day on your calendar with just the right weather conditions for staining and getting the job done. Before you get started here’s a few tidbits and tips you should know.
Borates are one of the most affordable ways to protect your log home. You’re basically buying low-cost home insurance. That’s a no-brainer! These preservative products are designed to protect your wood from rot and wood-ingesting insects. Adding this affordable step at the beginning can save you headaches down the road, including the time and money it costs to replace damaged wood.
You’re ready to restore a historic log home? It’s exciting but requires special knowledge. Therefore, before you dive into any historical preservation or log home restoration project, here’s what you need to know from a restoration expert.
The background
Recently, Mark Nelson of Nelson Restoration worked on a Grand Teton National Park project. Mark partnered with Sashco to provide key decision makers with the best information regarding log structures preservation. A report by Sashco contrasted traditional preservation methods such as mortar and linseed oil with modern products.
Both approaches were discussed in the report, which was compiled with Mark’s input. Modern products are often easier to use and cost less in the long run, even though traditional methods require more maintenance. Also discussed were the environmental impacts of each approach, noting that modern products are typically more sustainable.
The rest of the story…
The report concluded that using modern products to preserve log structures is a viable option. Above all, it gave stakeholders the information they needed to make an informed decision .
Folks are passionate about getting the perfect color on their home. It can be a challenge when there are so many factors that can affect stain color. We’re here to help explain exactly what affects that perfect color so expectations are crystal (or, perhaps semi-transparently) clear.
Stain Color Rule: The final color will always be a combination of every visible layer.
When applying transparent or semi-transparent stains (which all of Sashco’s stains are) everything under the stain affects the color.
(Side note: with solid stains and paint, only the stain or paint shows, not the wood underneath. Unfortunately, this also hides developing problems that you won’t find until it’s too late. This is why Sashco doesn’t make, nor recommend, solid paints and stains for logs. Whew! That was a long side note.)
So, what affects the first coat of color?
The color of the wood itself (species and even individual logs can vary a LOT)
The absorption capacity, aka porosity, of the wood (again, species and even individual logs can vary a LOT)
The condition of the wood. This include factors such as:
Is it newly sanded?
Is it sunburned? Is there yellowed wood present? (Wood yellows/oxidizes as it ages. Shameless plug: Colorfast can minimize this color change!)
Gray, weathered wood — this wood always stains to a black color!
Clean or dirty wood — every discoloration from dust, pollen, bird poo, mold, etc. will be locked in under the stain if not first removed.
The previous exposure of the wood. On recoats, exposed walls are expected to be more porous and stain darker than walls that are more protected from the elements.
The penetration of the stain. Keep in mind that oils penetrate, acrylics don’t – well, not much.
The color of the stain being applied.
TIP: You can wet the wood down with a little water and it will darken somewhat. Imagine a brown cedar shake – it “wetsout” to be dark brown-black. Gray wood also goes nearly black when wet. Thiswet down is a good double-check for color, as well as a test for sufficient prep on formerly gray weathered wood.Still dark after all that sanding? You need to sand some more.
What affects the second coat of color?
The color of the first coat. (Seems like a “duh” statement, but sometimes the obvious isn’t so obvious.)
The absorption capacity (aka porosity) of the stained surface. Just like wood, stains vary in their porosity! Things to consider when it comes to absorption:
Film-forming stains in good condition won’t allow much, if any, penetration (Hint from the pros and also the novices: This is the perfect time to do maintenance—when things are still in good shape! Wait too long and you’ll have more extensive and expensive prep on your hands.
As some stains age, they get more porous and will absorb quite a bit of stain. Eroding alkyds (Sashco’s Transformation Siding & Trim) are an example of this type of stain. They don’t peel, they erode over time, which makes them more porous.
Wet on wet coats: Drying oils — alkyds or natural oils like Transformation Log & Timber — need the first coat to cure before the second coat is applied. Otherwise, the second coat soaks in and results in a dull look and a different color.
Non-drying oils will soak in more and more, oil as they never dry. The color deposited on the surface will remain for only a while, then will be burned off the surface within a few months. (These types of stains also interfere with the adhesion of chinking and caulking. Every log home has some areas that need to be sealed. As such, Sashco doesn’t recommend any products with silicones, waxes, or non-drying oils.)
The color of the stain being applied as the second coat. This can be different than the color of the first coat. Shifting to a darker color can really highlight wood textures.
Add it all together and you get…
…a different color every time! The vast number of variables that affect the color means that sampling is always your best option, even when doing maintenance. It’s why Sashco provides free samples of our stains and clear coats. Be sure to contact Customer Service when you need them!
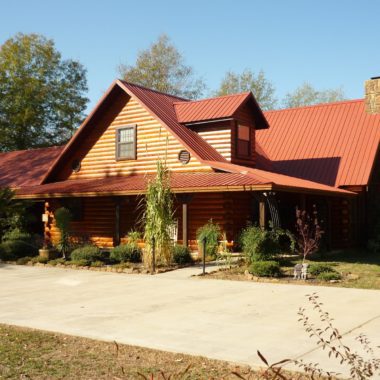
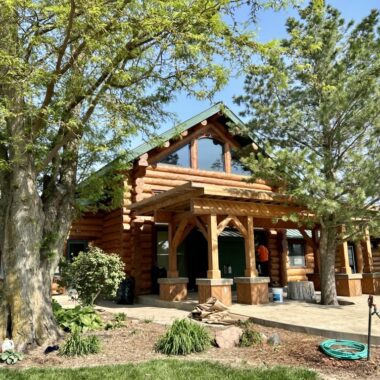
At Sashco, we know that logs ain’t wood. So whether your’re finally building your dream home, looking to do some routine maintenance to keep your weekender log cabin looking beautiful, or in need of a complete log cabin renovation and restoration, we’re here to help with a full line of specialty log home finishing products.
Order Stain Samples
We make stain selection simple with curated colors and everything you need to create a log home you love, delivered.
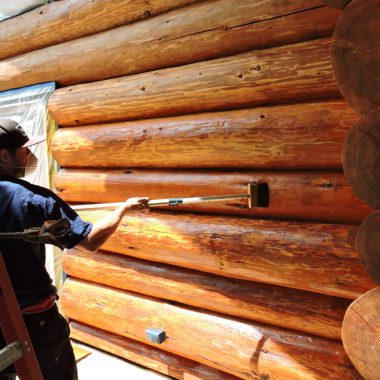
So now it’s time to prepare your wood for staining. Substrate preparation is the most critical step in achieving stain longevity. As Kurt Denman of Benjamin Moore® stated in the February 2007 edition of Coatings World magazine, “I cannot emphasize enough how critical proper preparation is to realize a successful staining project. It’s the ultimate determinant on how long the beauty of a job lasts.” Properly preparing the wood from the get-go will save you both time and money down the road.
What is secondary prep? After you’ve gotten down to clean sound wood it’s time to clean up and remove wood fuzz media blasting another methods left behind.
When properly done, most blasting methods create at least some “felting”, AKA “wood fuzz.” Prior to applying any finishing products you must remove wood fuzz. Eventually all of that fuzz will fall off, so any stain applied to it will leave a mottled appearance and leave those areas exposed to weather. Additionally, blasting can sometimes raise the grain too much, making the wood too coarse. Even though the coarse texture is beneficial for stain adhesion, it makes the stain look darker and rougher.
Tips to Help You Choose a Log Home Stain Color You Love
Choosing a stain and actually staining are two very different things. Part of the plan must be to sample the stain on your unique logs so you know what color to expect.
Sampling log stain colors on your home is a key step to ensuring you’ll love the stain color you choose. But how do you know which type of log stain you need for your unique log home? We know the struggle is real, so we’ve simplified the stain selecting experience, including the way you sample log stain types and colors.
First, Consider Compatibility
If your home is already stained, stain compatibility is a huge issue because not all stains are compatible with one another — nor with all sealants. That’s why it’s important to select a stain that will be compatible with caulking and chinking. When you consider that an average 2,200 sq.ft. ranch-style log home has literally one mile of log joints, many of which will need to be sealed at some point in time, adhesion compatibility with the stain you use is critical.
Next, Think Stain Types and Performance
There are three different types of stains available to you. Keep in mind that not all stains are created equal, and how deep a stain penetrates doesn’t necessarily equate to better performance. The best value for your dollar may be in a more expensive stain that has been formulated for a specific type of application, i.e. decks, logs, wood siding, etc.
With all types, good prep is important to get maximum longevity. Sashco recommends going with a surface stain or a shallow penetrating stain, both of which afford your home the greatest protection and long-term performance. The three types of stains are discussed below.
Not a product Sashco makes – we only make high-performance product lines.
Can be used on log homes, but won’t last long
Can penetrate as much as ¼” or more into wood
Good for decks, hand-rails, and roofing materials
Not compatible with most other finishing products (sealants in particular)
Appearance is short-lived, even with frequent re-application
Choosing a Stain Color
Your stain color sets the tone of your home—which why it’s important to request samples and test several different stains and colors to ensure you get the color you want.
Sashco recommends that you stay away from clear stains. Why? In sun-drenched areas where only a clear stain is used, the wood’s natural color will begin to darken after only a few months. While you’re not alone in wanting to keep as natural a look as possible, clear coats that promise to preserve the “just built” look are misleading. It’s impossible to load enough UV absorbers in any clear stain to sufficiently protect your wood. And even though the stain may still be repelling water, dark yellow and gray discoloration of the wood is a sure sign that the UV absorbers have lost their effectiveness.
We recommend you stick with high-quality, UV-absorbing stains loaded with pigments – which is where you get the majority of your UV protection – and follow these sample testing procedures to make sure you get it right before you start.
Need help choosing a stain color?
Check out our Inspiration Gallery – where you can view our high-performance log stains, sealants, and chinking products on real log homes. You can view by stain type and color to get a feel for the endless possibilities. Create your dream home, order our log stain sample kit today!
Have more questions, call one of our log home gurus and they’ll be happy to answer any of your log home staining questions today.CALL NOW
At Sashco, we know that logs ain’t wood. So whether your’re finally building your dream home, looking to do some routine maintenance to keep your weekender log cabin looking beautiful, or in need of a complete log cabin renovation and restoration, we’re here to help with a full line of specialty log home finishing products.
Order Stain Samples
We make stain selection simple with curated colors and everything you need to create a log home you love, delivered.
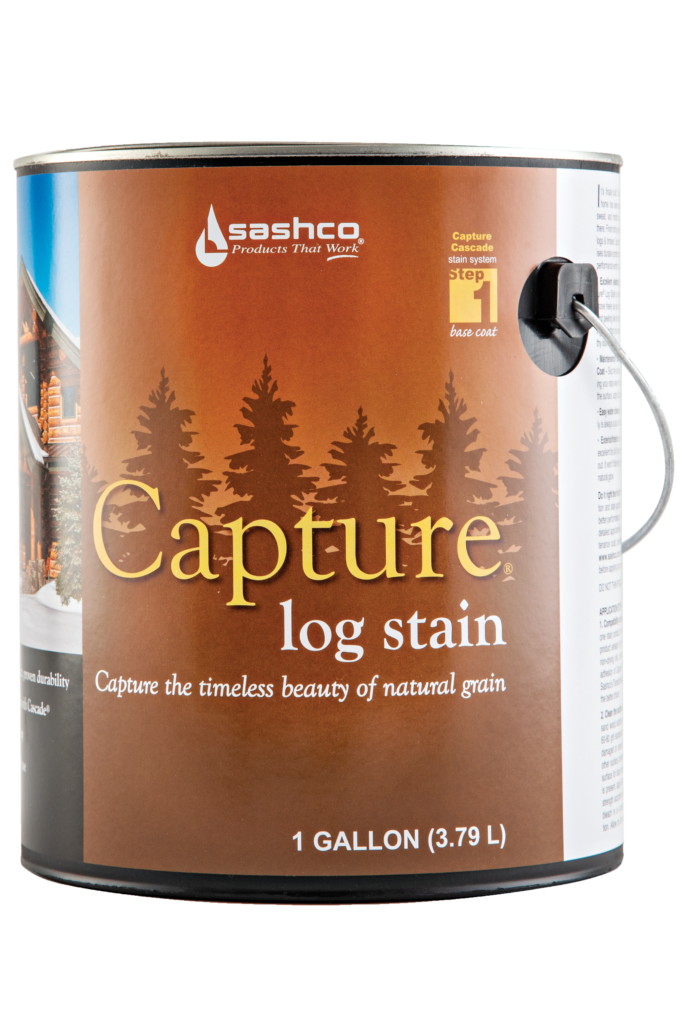
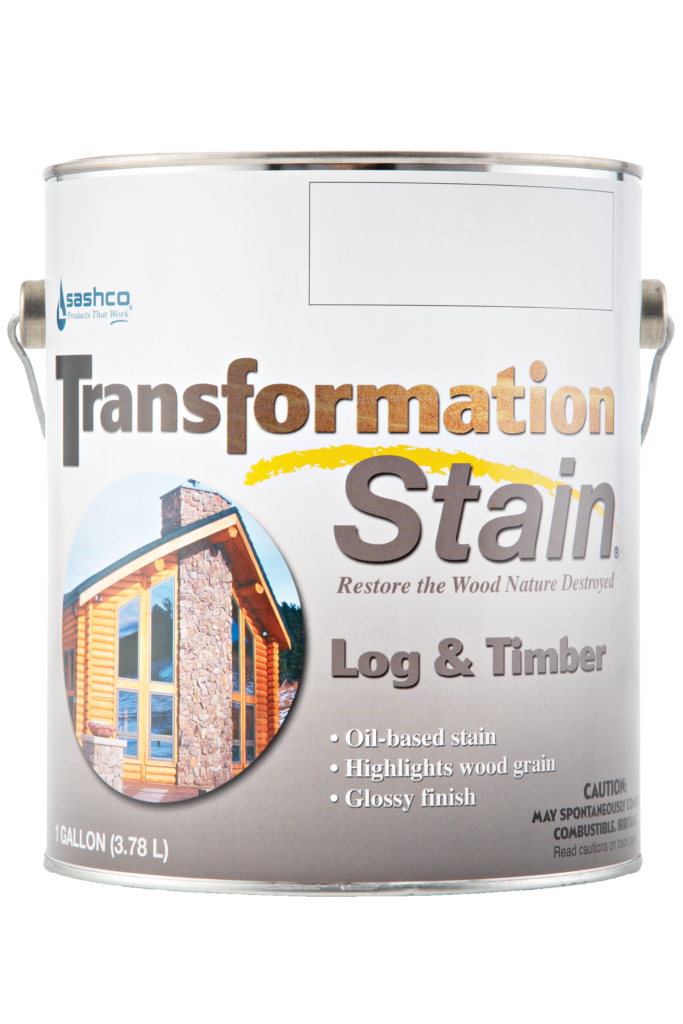
Don’t compromise at the end of a long and arduous journey by using an inferior stain not designed for logs. Capture and Cascade deliver performance worthy of the journey that got you here.
Moves with your logs and timbers
Won't hide the wood grain
Easy clear coat maintenance with Cascade(R) exterior clear coat
Backer Materials that Seal Things Right the First Time Backer Rod, Grip Strip, and Log Gap Cap all help you create the ideal joint desing for a long-lasting, durable seal
Logs are in constant dynamic motion. That's why there's Log Builder®, the sealant made for log structures. Stretches up to 500% of original size, while still maintaining tenacious adhesion to the wood.
When other chinking pulls away, Log Jam holds its seal With Log Jam chinking, you can keep the cozy feel and rustic look of a log home without compromising comfort and performance.
Easy to Use - Hard to See Keep out weather, bugs, and moisture without seeing it. Conceal disappears into the woodwork so you don't know the wood starts and the caulk begins.
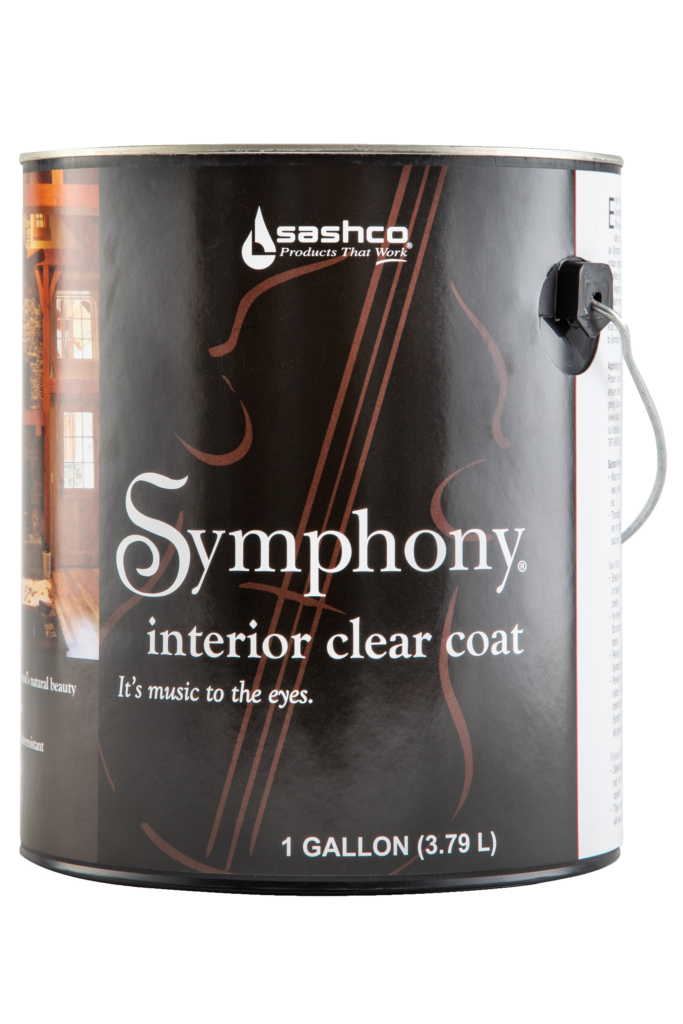
It's Music to the Eyes Symphony works in harmony with the unique character of your logs and wood to reflect an atmosphere or cozy warmth and elegance while creating and scuff-resistant and durable surface that's easy to dust.
Right Color. Right Quantity. Right Now. Never run out of stain at the jobsite again. Stock exactly what you need in your truck or trailer at the jobsite.
Easy to mix
The same color, durability, and application you've come to expect from Capture Log Stain and Transformation Log & Timber
Maintenance Made Easy Now that Capture® Log Stain is applied, it’s time for Cascade® Clear Topcoat to bring out the depth and character of your unique woodgrain while protecting it against moisture, mildew, and algae. Predictable and affordable routine maintenance with Cascade throughout the years means your home stays protected and beautiful. Easy!
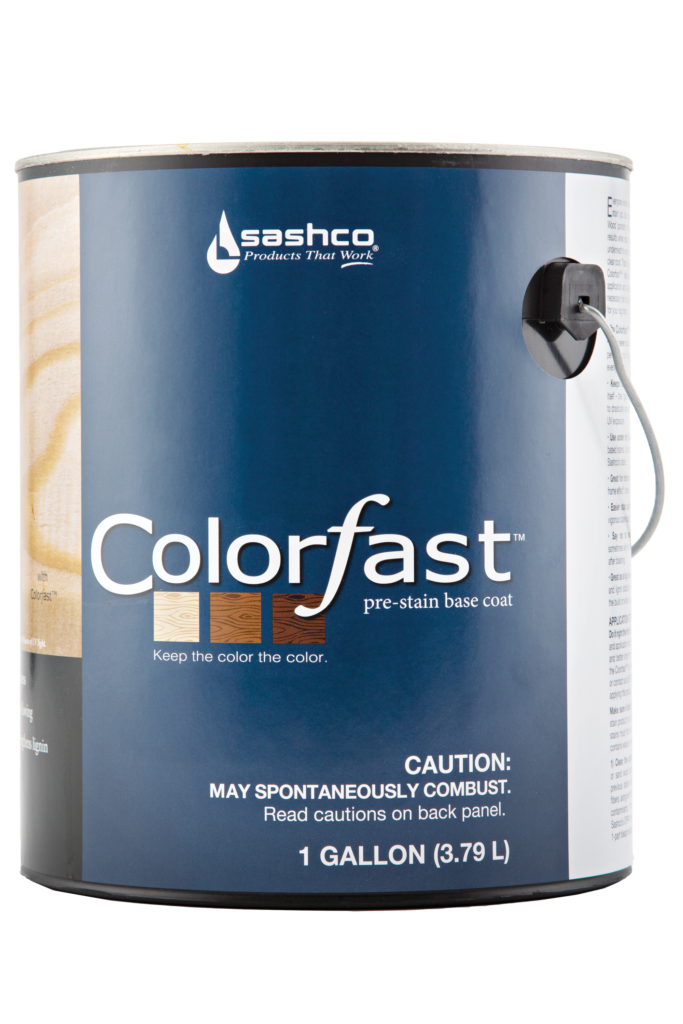
Keep the Color the Color Colorfast delivers the ideal canvas for stain application and leaves behind the strong foundation necessary for long-lasting color. It’s color confidence for your log home.
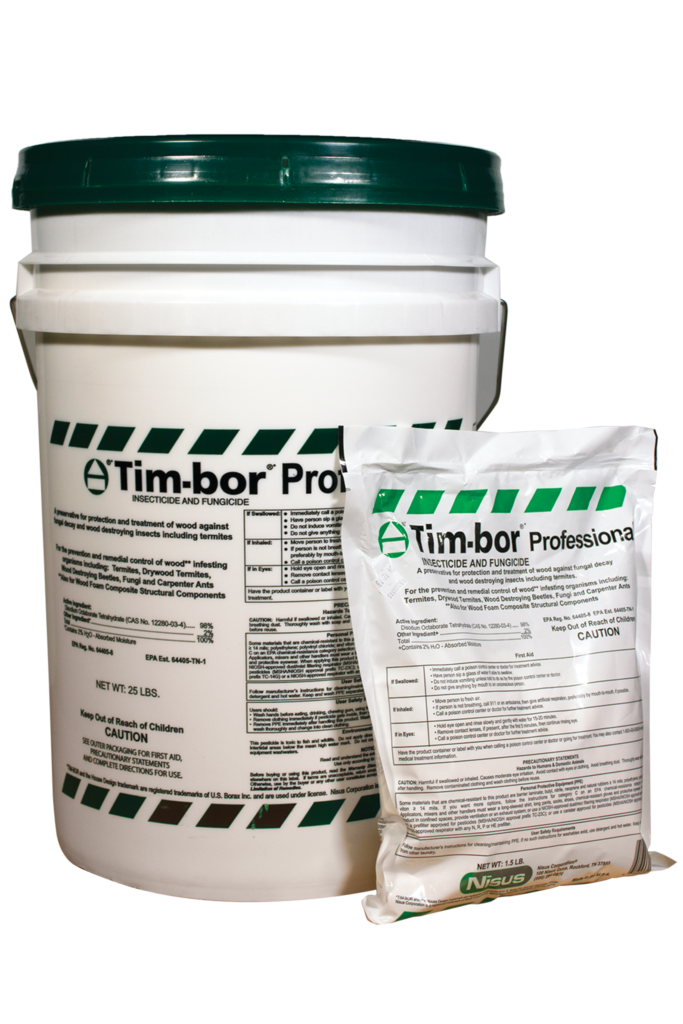
Rot, weather, insects, fungi all pose a serious threat to your logs. Protect your investment—treat your logs first to make them last. Tim-bor® helps protect your home from the costly damage caused by rot and insect infestation.
Bugs don't stand a chance
Easy to mix and apply
Prevents decay fungi
Costs 5 times less than glycol-based borate products
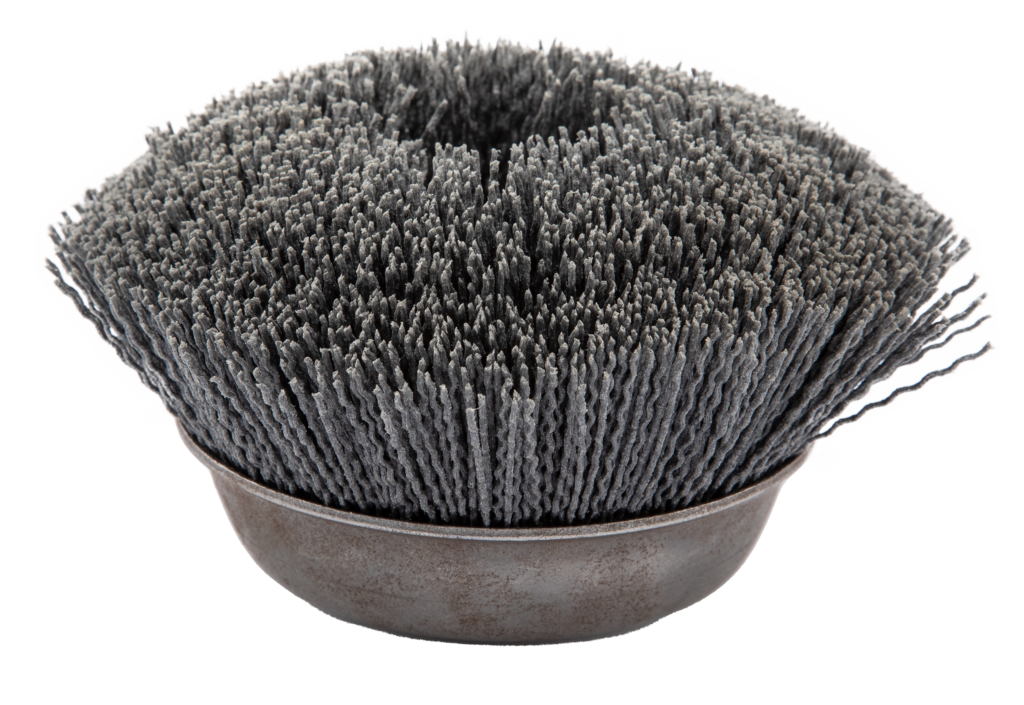
Remove Wood Felting and Raised Grain Remove wood fuzz (called felting) after power washing or media blasting, and knock down excessive raised grain with Sashco's finish sanding tools
Clean and brighten bare logs and wood, remove surface dirt, pollen, and kill mold for maintenance, and keep your logs looking fresh with CPR Log Cleaner and Brightener