Primary Menu

Some homes are built on land. Others are built on stories. 

Before a single log was stacked, before stain colors were debated or chinking lines were planned, this property already mattered. A lot. Itโ€™s where Jerry Fekete spent his younger years training as a competitive road bike racer, pedaling the roads that wind through the countryside. Years later, after life took him to other states, he returned with his wife, Jennifer, showed her the land, and she fell in love with it too. 

They didnโ€™t just choose this property for their future log home. They chose it for their wedding. 

They were married right there on the land, before the house existed, and then decided to build a log home that honored the place, the past, and the future they were creating together. 

Thatโ€™s where Jeffus Log Home Stain & Service comes in. 

When Weather Has Other Plans 

Jeffus was first contacted by the homeowners in 2023, referred by Sashco’s own Paul Peebles. The home had already been stacked. Unfortunately, Mother Nature didnโ€™t get the memo about timelines. 

Monsoon-like weather delays meant the roofing crew couldnโ€™t get the roof on in time, leaving the logs exposed to prolonged rain and heat. As you can imagine, that combination led to staining and mildew, inside and out. 

At the same time, Jerry and Jennifer were living in another home while slowly completing this one themselves, carefully working within a yearly budget and doing as much hands-on work as possible. (Both engineers, both extremely detail-oriented, and yes, every bit as meticulous as youโ€™d expect.) 

The goal wasnโ€™t just to โ€œfixโ€ the damage. It was to do it right. 

Prep, Patience, and a Custom Vision 

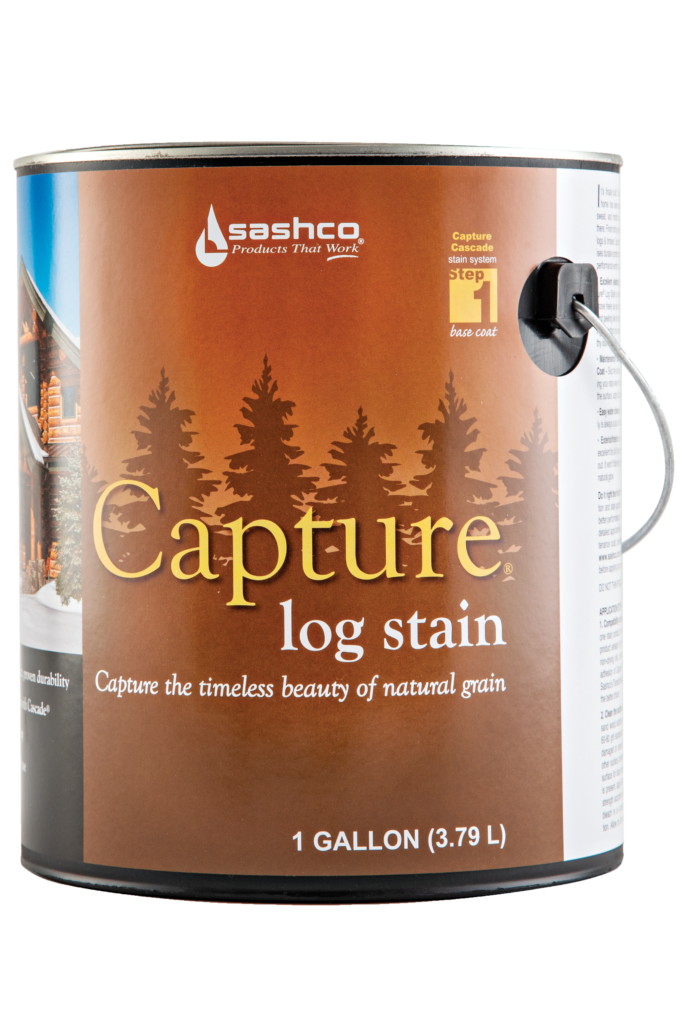
The homeowners had a clear vision: A custom color blend using Capture Log Stain in Chestnut and Hazelnut, paired with Log Jam Woodtone Cedar chinking. Rich, warm, timeless, but precise. 

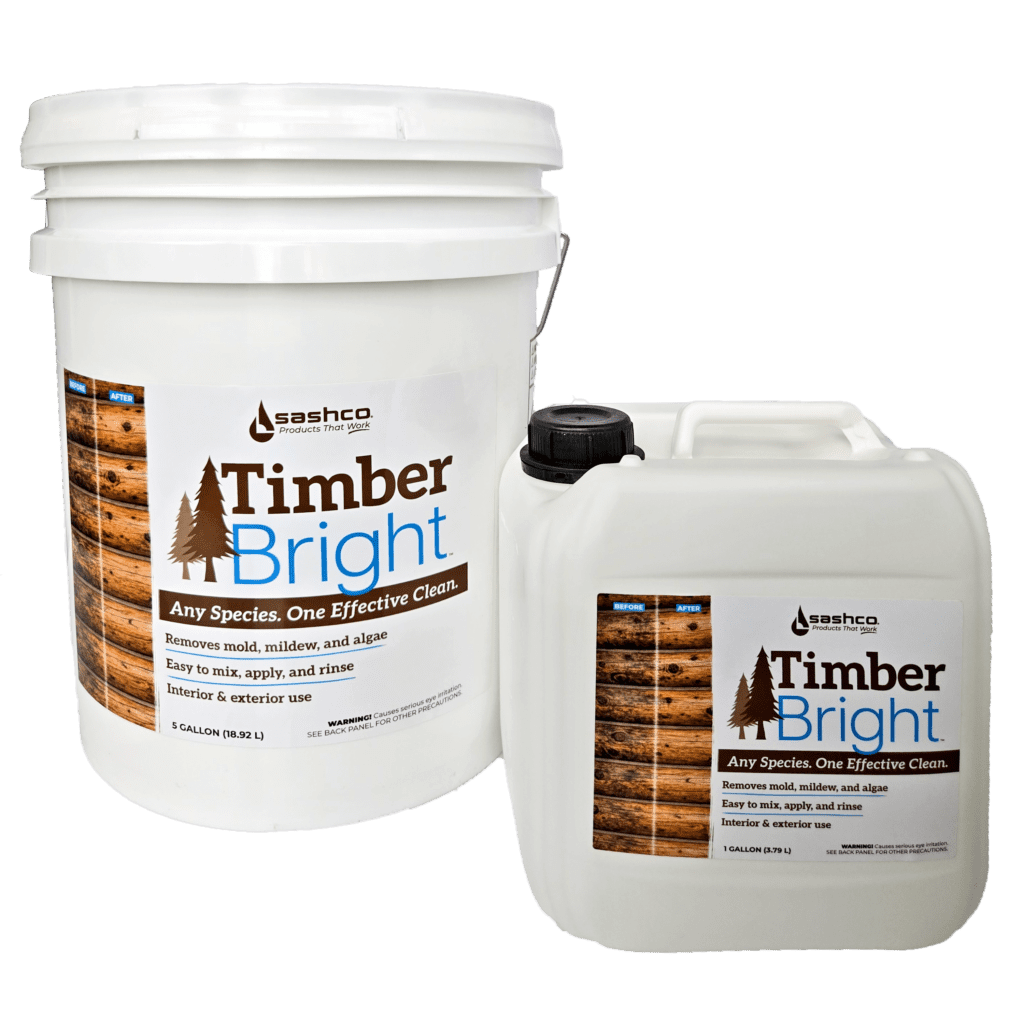
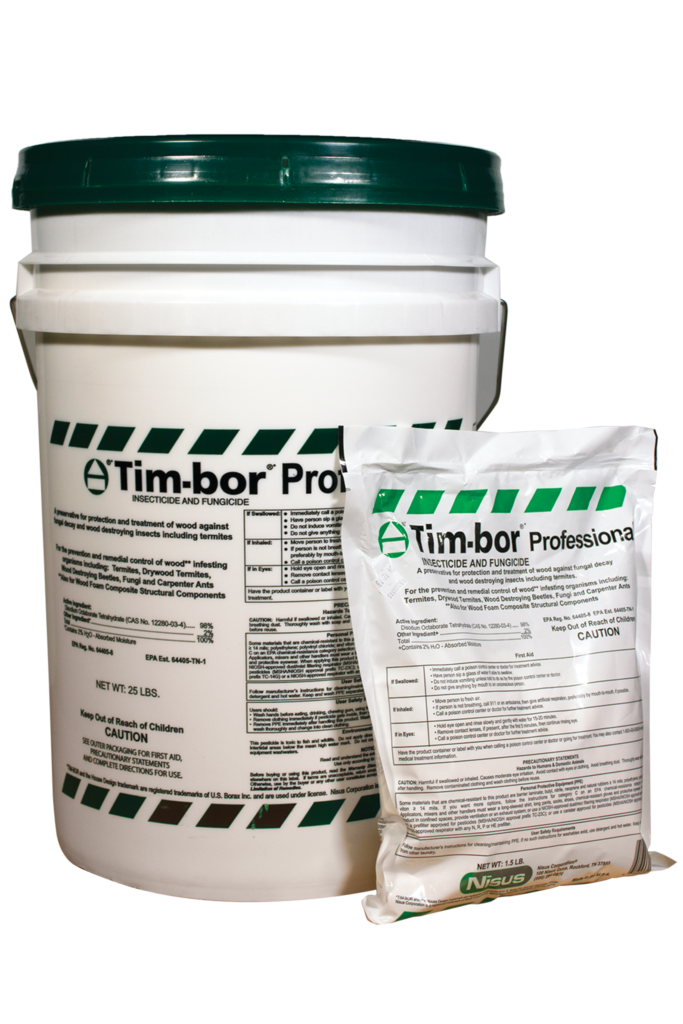
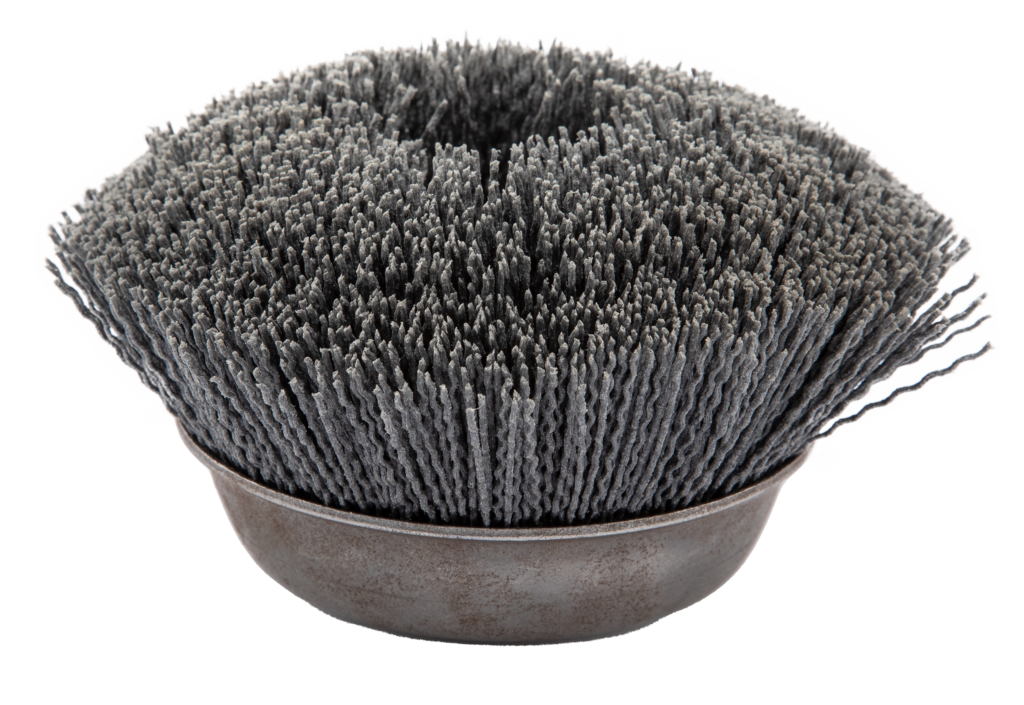
Every non-log wood surface was sanded with 60-grit to remove mill glaze and properly prep for stain. The logs were treated with CPR Log Cleaner, pressure-washed and then treated with borates for long-term protection. 

From there, Jeffus applied Colorfast Pre-Stain Base Coat, followed by a first coat of Chestnut Capture Log Stain and a second coat in Hazelnut. Window trim, fascia, rafters, and deck railings were stained to match the logs, while the board-and-batten siding was finished in Capture Log Stain Natural. Cascade Semi-Gloss went on last to protect all exterior wood surfaces, including the T&G soffits, and Conceal was used to address checking and cracks. 

This was about restoring confidence in the home and setting it up to last. 

Bringing the Story Inside 

In 2024, the Jeffus crew returned to focus on the interior. Upper-level log-look siding was installed, sanded to 80-grit, along with the upstairs tongue & groove ceilings and beams. Interior logs were carefully sanded to remove mildew damage and prepped for stain. 

The interior color choice (it deserves a pause, yes, it’s that beautiful), Capture Autumn Aspen, completely transformed the space. Warm, inviting, and perfectly balanced. All interior wood surfaces were sealed with Symphony Interior Clear Coat for durability and depth. 

That same year, the deck was sanded and stained using Transformation Stain Siding & Trim in Woodtone Cedar, tying the outdoor spaces seamlessly into the homeโ€™s natural surroundings. 

The Details That Matter (Especially to Engineers)  

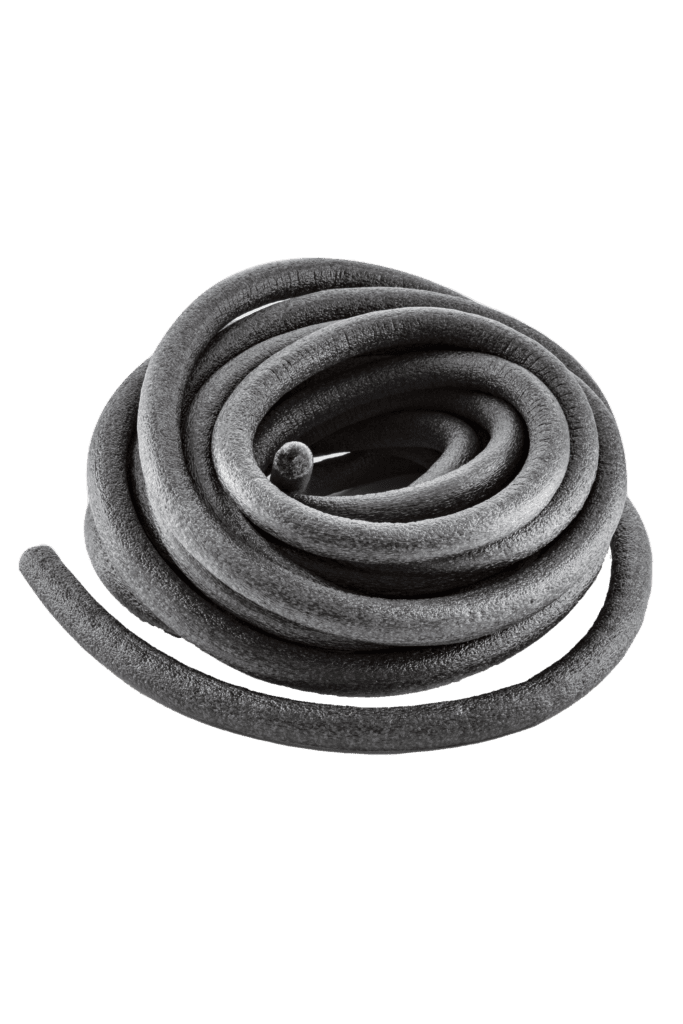
By 2025, it was time for exterior chinking. Log Jam was installed, followed by stain correction, touch-ups, and a fresh, clear coat to seal and protect everything, including the chinking itself. 

Interior work continued with first-floor log-look siding, and plans were set to stain the downstairs interior walls to match the rest of the home. Window trim and additional interior details are still ahead. 

Over the coming winter, oak flooring will be installed, more interior siding added, and Jeffus will continue helping Jerry and Jennifer tackle the remaining projects with one shared goal in mind: moving in by spring of 2026. 

A Home Rooted in Place  

Jeffrey Jeffus, owner of Jeffus Log Home Stain & Service, told us, “One of the best parts of working on this home is how connected it is to its surroundings. Harmony Hill Market at Bryant-Thomas Ranch sits just next door, and when weโ€™re on site, we grab beef, pork, and chicken from their little ranch store. All grass-fed, humanely raised, and literally within walking distance of the driveway. It feels right. Like the house belongs here.” 

This isnโ€™t just a log home. Itโ€™s a lifetime of memories coming full circle. Built with intention, patience, and a whole lot of care. 

Jerry and Jennifer, weโ€™re honored to be part of your story.  


Jeffus Log Home Stain & Service, loghomeartist.com
Instagram: @loghomeartistย 

Share this:

Log home stain samples

Ready to stain? Donโ€™t guess! Sample. Testing stain colors on your actual logs before committing ensures that you get the exact look you want and helps prevent โ€œoopsโ€ moments later. Snag your free samples here.

When it comes to protecting and beautifying your log home, Sashco isnโ€™t just another stain on the market โ€” itโ€™s the high-performance choice for serious log lovers. With industry-leading products like Capture, Cascade, and Transformation, Sashco combines cutting-edge technology and rugged durability to keep your logs looking stunning and standing strong year after year. Whether youโ€™re chasing that perfect finish or just want to avoid the heartbreak of costly repairs, Sashcoโ€™s got your back. Because your log home deserves more than โ€œgood enough,โ€ it deserves Sashco. Made for logs. Made to last. Made to make your neighbors jealous.

(more…)

Ah, summer. The moneymaker! You’re in the thick of the busy season. It’s easy to get caught up and put off planning for leaner times. Don’t make that mistake! One of the wisest ways to prepare for the slower season is to build value-added services into your business now. These four “all-season” money-making services keep your bottom-line consistent and strong all year long.

(more…)

Do you know the five most common signs that you need to do log home stain maintenance?
Identifying signs that it’s time to maintain your log home with a fresh coat of stain, or Cascadeยฎ Clear Coat is easy. Start by downloading this handy inspection guide to carry along with you as you perform your inspection as the very first step in your maintenance plan.

Loss of sheenย 

Most clear coats have a satin sheen when first applied, and while still in good shape. Over time, that clear coat or stain erodes due to weathering. Look at your home in the sun or take a flash light to it. If it looks a bit flat, itโ€™s time for maintenance.ย 

Color shifts in log Stain

Does your stain look darker than it did originally? Perhaps thereโ€™s some fading going on where itโ€™s exposed to sun? Both are signs that your stainย (and theย UV filters in it) have worn off and need to be replenished.ย 

Water not shedding

Break out the hose or a spray bottle. Is water still running down the logs? It should sheet off the wood, not bead up. Any areas where water isnโ€™tย โ€œsheetingโ€ย well needs a fresh coat of stain or clear coat.

Dirt, pollen, bird poo, etc.

Over time, surface contaminants will eat away at the integrity of your stain. If you can see these contaminants, it’s time for a good wash down at least, and possibly time for more another coat of stain.ย 

New micro checks and cracks in the wood

Have any new micro checksย (theย tiny cracks in the face of the logs themselves) appeared? If so, those are unprotected by stain and need to be treated! Left unprotected, they’ll allow moisture to come in that can compromise the integrity of the stain, not to mention invite rot. Make sure new micro checks are filled with stain or a your clear coat.ย (Important note: Make sure any crack that’s 1/4″ wide or larger on the upper curve of the log is caulked with Concealยฎ or Log Builderยฎ, not just stained.)
We have GREAT news! Itโ€™s only necessary to apply more stain and/or a clear coat where itโ€™s needed, when itโ€™s needed.
In some cases, the north and east sides of the home can be skipped the first time you maintain the south and west sides. They don’t get the same UV exposure and donโ€™t tend to need care as soon. Any areas protected by an eave, overhang, or porch will likely require less maintenance over time, too. Proper planning and education will help you stay on top of your maintenance, so many times there’s no need to re-coat the whole darn house every time.ย (We’reย all about saving the weekends for fun and relaxation, too.)
Thatโ€™s it! Great job! You’ve determined what needs to be done to protect your log home come spring.
Need a little more guidance and help planning? No problem, our customer service team is always happy to help! Give us a call at 800-767-5656.

Keeping your log home beautiful and protected is a big deal. Youโ€™ve invested too much to skimp when it comes to stain maintenance. Consistent maintenance inspections and routine reapplication of stain or clear coats where needed, when needed, are the key to keeping your dream log home, well, dreamy.

That said, how many times have you thought, โ€œI should really get this project done around the house,โ€ and then put it off another year?

We wonโ€™t require you to answer (because then weโ€™d have to admit the same thing ourselvesโ€ฆeek!)

(more…)

Have you ever tried to run a cloth or duster over wood with no clear coat on it? Itโ€™s horrible! It catches on the wood, doesnโ€™t remove the dust, and ultimately makes a bigger mess. Even worse is trying to clean wood that is permanently yellow from UV exposure and oxidization. Follow these 3 steps to create an easy-to-clean, won’t-get-discolored constant warm glow in your log or wood home. BONUS: Interior finishing needs to be done only once. Routine cleaning โ€” wiping down cobwebs, dust that settles, fingerprints, etc. โ€” is all thatโ€™s needed to maintain the finish and keep the wood looking like new.

(more…)

Outdoor hand rails and spindles, especially those not protected by overhangs, require specialized and more frequent care because of their extreme exposure to weather. A few easy tips are all it take to to prevent rot on log railings.

(more…)

So, you did a stellar job of sealing cracks and checks in your log home. Hooray! Now, a couple of years later, youโ€™re noticing that some of the caulk has cracked. After all that hard work? Ugh. So, what do you need to do to fix cracked caulk? Keep reading for all the details.

Why does caulk crack anyhow?

On most log homes, a handful of those logs will undergo extreme movement. This movement is a part of what makes a log a log. Moderate movement is normal, but the occasional maverick log can randomly and unpredictably twist, shrink or warp in response to moisture changes (like the first time the heat is turned on that winter), moving more than any sealant can possibly handle. When this extreme movement occurs, it will cause the sealant to fail either cohesively or adhesively. Hereโ€™s how to do repairs.

Cohesive failure

This is where the sealant splits apart down the middle of the joint. Thereโ€™s still caulk sticking to the sides of the joint. Repairing cohesive failure is pretty simple:

  1. Relieve the pressure by taking a razor blade to finish the job. (Sounds silly, but this is necessary for the repair to work properly.)
  2. Insert backer rd behind the caulk, if there isnโ€™t some there already.
  3. Clean the surfaces to remove dust and other surface contaminants.
  4. Apply more sealant right over top. You can only do this if the product youโ€™re using is compatible with whateverโ€™s already in there. With Sashcoโ€™s products, this is no problem. If you used silicone, youโ€™ll have to remove it all. Boo.(Moral of the story: donโ€™t use silicone on log homes.

Adhesive failure

This is when the sealant pulls away from the edge of the logs. In this case, a bit more investigation is necessary. Adhesive failure can be either due to movement or because of an incompatibility between the stain or clear coat used on the logs and the caulking. If itโ€™s only due to movement, hereโ€™s the fix:

  1. Remove the sealant completely. Youโ€™ll have to cut it out entirely.
  2. Insert backer rod or another bond breaker behind the caulk or chinking, if one is not already there.
  3. Clean the joint, especially at the edges where the new product will be sticking. Make sure there are no loose wood fibers or peeling stains or paints. It may mean you need to break out the sand paper or Dremelยฎ tool. (Power tools. Argh.)
  4. Apply more caulking or chinking over top. Smooth it out, just like before.

If the failure is due to an incompatibility between the stain/clear coat on the wood, youโ€™ll have to do some more extensive work to get the new caulking or chinking to stick:

  1. Remove whatโ€™s in there now.
  2. Sand down the edges of the joints to remove the stain/clear coat.
  3. Clean with a degreaser of some kind (Formula 409ยฎ and the like do a good job).
  4. OPTIONAL (and best): Stain just those areas with a compatible product.
  5. Insert backer rod or a bond breaker, if one isnโ€™t already there.
  6. Apply more caulking and chinking, smoothing as before.

Looking for tips on log home care and maintenance? Check out our blog for more tips and information that will help you preserve your dream log home.

Log Blog

Explore inspiration, learn about our products and get tips from the pros over at the Log Blog!

Borates are one of the most affordable ways to protect your log home. You’re basically buying low-cost home insurance. That’s a no-brainer! These preservative products are designed to protect your wood from rot and wood-ingesting insects. Adding this affordable step at the beginning can save you headaches down the road, including the time and money it costs to replace damaged wood.

(more…)


Mildew vs. Algae: Mildew growth on a log railing spindle…or is it algae? What is that black stuff growing on my house? Mildew, right? Well…maybe not.

(more…)