Preventing Blisters in Sealants
Preventing Blisters in Sealants
Blisters in sealants aren’t uncommon, but they can be avoided and are fairly simple to fix. Following is a brief discussion of their causes and solutions.

Causes of Blisters
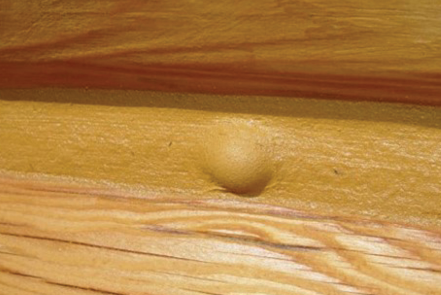
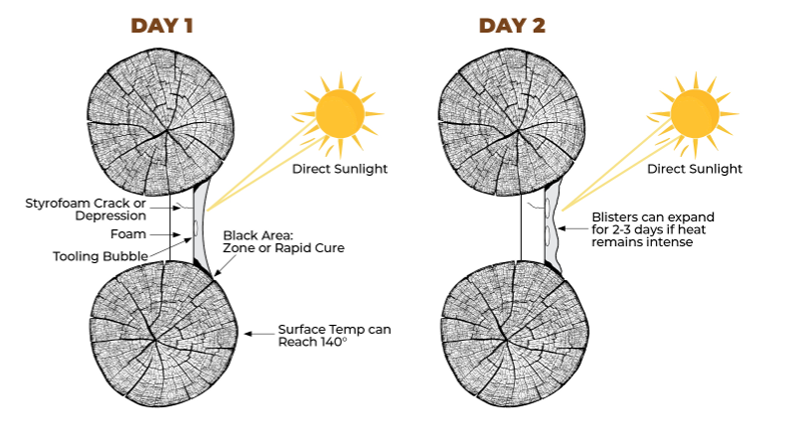
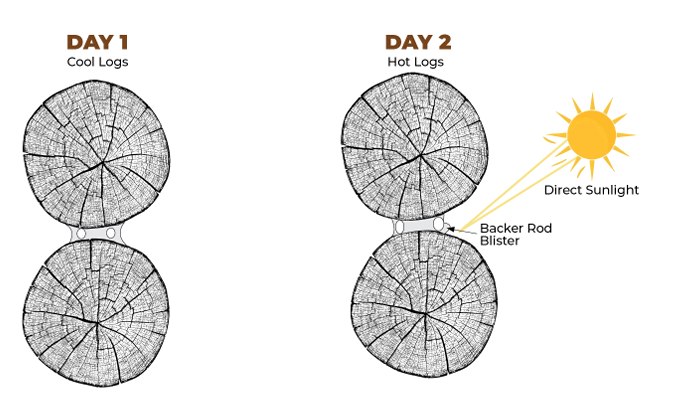
The basic cause of any blister is a build-up of gas between the substrate — a log, wood siding, concrete slab, etc. — or backing surface and the sealant. It occurs during the early curing stages when the sealant is soft but has formed a skin on the surface. Heat, usually in the form of direct sunlight, causes the gas to expand. As the gas expands, it pushes the sealant out, creating a blister. This gas can come from water, wood sap, or even the backing material.
What Circumstances Create the Gas?
Scenario #1 – Trapped Water Vapor:
As water-based sealants cure, they give off water vapor. Any physical condition that traps the resulting water vapor could cause a blister, especially if the substrate and the sealant are heated by direct sunlight.
Scenario #2 – Dead-End Crack:
Dead-end cracks in the substrate where moisture vapor accumulates can expand when heated.

Scenario #3 – Pitch Pockets:
Logs in particular often have what is termed “pitch pockets.” These are areas of concentrated pitch, or sap, sometimes containing several gallons! (Pitch pockets of 50 or more gallons are known!)
This sap (or its vapor) will follow cracks in logs, coming out of the log — almost anywhere. Sap has a volatile component and, when heated, forms a gas which causes blisters.

We’re an 87 years-young family company that geeks out over a better way to caulk and stain. Making a ‘Good, Better, Best’ product range just doesn’t turn our crank. We’re passionate about making the highest performance product possible for each project.
Order Stain Samples
Order a Log Stain Sample Kit to see our amazing high-performance stain technology first-hand!
Technical Product Inquiries
Call a specialist at 800-767-5656 or complete the Technical Inquiries form to ask a technical question.
Where to Buy
Find dealers near you and see which online retailers sell Sashco by visiting our Where to Buy page.
Check Out Our Videos
We geek out over sealant technology and high-performance building. Watch our videos to learn more.
Preventing Blisters
The basic cause of any blister is a build-up of gas between the substrate — a log, wood siding, concrete slab, etc. — or backing surface and the sealant. It occurs during the early curing stages when the sealant is soft but has formed a skin on the surface. Heat, usually in the form of direct sunlight, causes the gas to expand. As the gas expands, it pushes the sealant out, creating a blister. This gas can come from water, wood sap, or even the backing material.
Control the Heat:
- Always apply sealants when it’s shady and cool. Avoid application to surface temps that are over 90°F whenever possible.
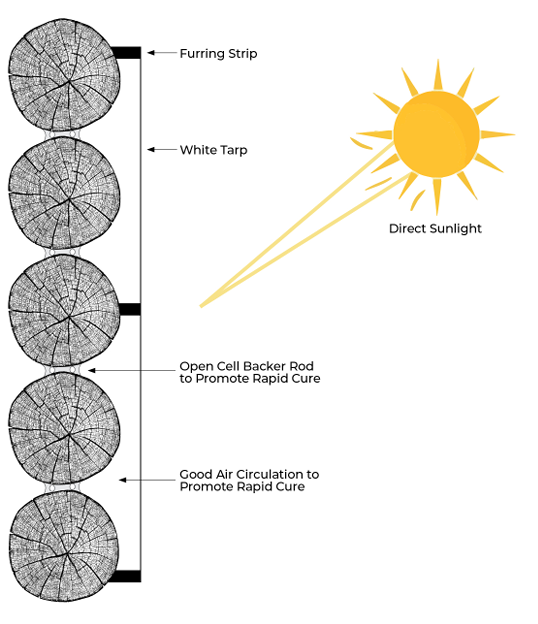
- When necessary (70%+ humidity, air temps above 85°F), protect surfaces from direct sunlight for a few days by covering with a light-colored tarp, cloth, or plastic. Leave plenty of room for ventilation.
- Prime or stain the substrate first. This can help to close some of the dead-end cracks first.
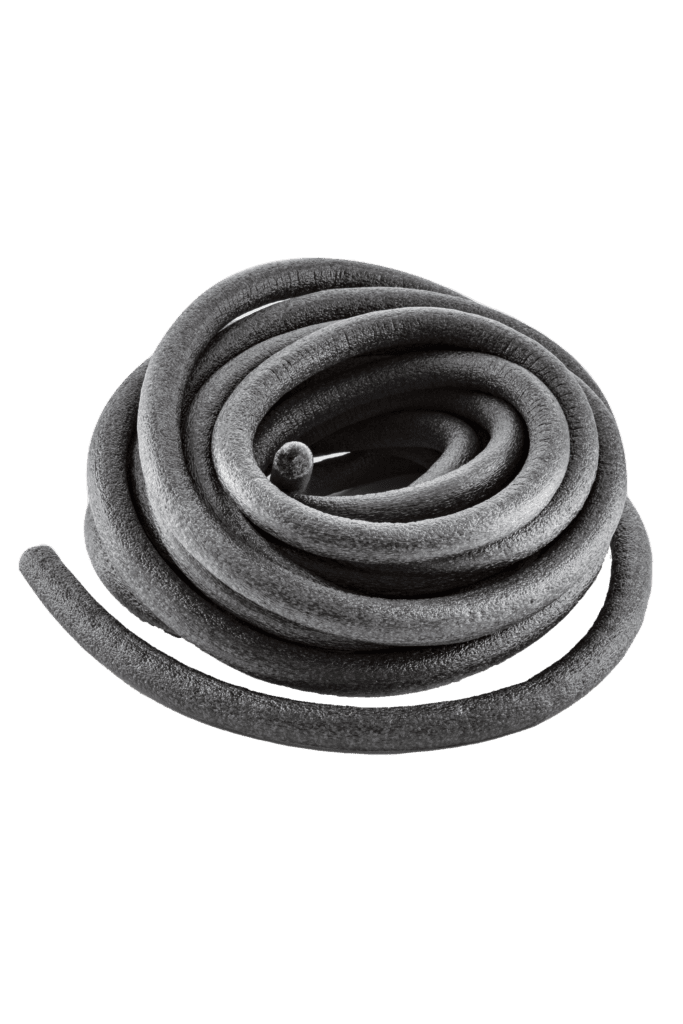
- Use blunt tools to install closed cell backing materials, being careful to avoid punctures.
- When applying sealants over flat insulation (foam, bead board or foil-faced foam board), surface cracks, holes or dents should be covered with clear packing tape.
Control the Backing Material:
- Use blunt tools to install closed cell backing materials, being careful to avoid punctures.
- When applying sealants over flat insulation (foam, bead board or foil-faced foam board), surface cracks, holes or dents should be covered with clear packing tape.
Fixing Blisters
When Fresh:
- Puncture the surface skin to release the gasses.
- Push the sealant down and back into place.
- 2 to 3 days later, apply a skim coat over the blistered area and smooth out to blend it in.
WHEN CURED / DRIED ALL THE WAY THROUGH:
- Cut out the dry blister with a razor blade.
- Apply more sealant.
- If it shrinks a bit and isn’t quite flush with the rest of the bead, apply another skim coat 2-3 days later to ensure the whole bead matches.
