How to Caulk or Chink a Log Home
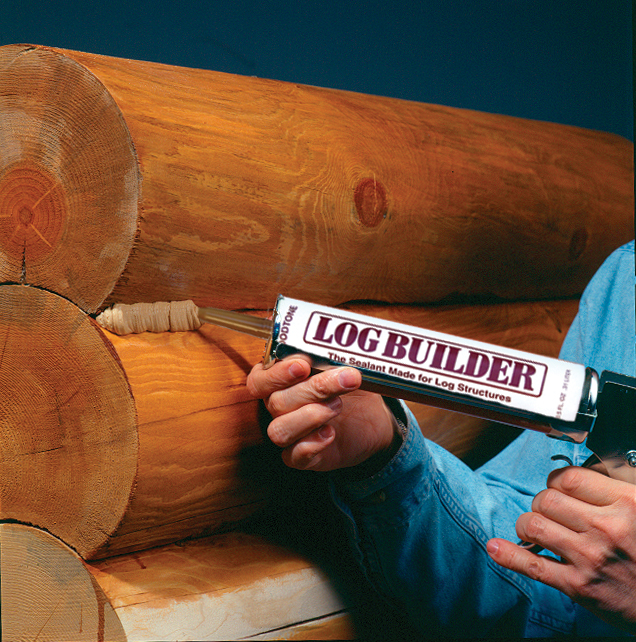
First things first, you’ll need a supply of Log Jam® chinking, Log Builder®, or Conceal®.
(Give our friendly and knowledgeable customer service folks a call. They’re happy to help you figure out colors and quantities.)
Next, gather the right tools. In addition to the caulking and chinking, you’ll need:
- Backer rod or clear packing tape
- Utility knife to open cartridges
- Caulking gun
- Follow plate, if using a 5-gallon bucket
- Foam brushes or trowels for smoothing the caulking and chinking
- Spray bottle and small container of water for smoothing
- Denatured alcohol if caulking or chinking during hot temps (above 80°F)
- Damp rags for clean up
- A lovely flannel shirt to help you feel very Daniel Boone-ish
Step one: Clean and prep the joints
If you’re applying chink for the first time, make sure the logs are stained with a compatible finish. All Sashco stains work with our sealants.
Clean off any dust, pollen, bird poo, etc. The sealants need to be applied to a clean surface in order to adhere properly and last for years to come.
If you’re repairing or replacing old chinking or caulking, remove any crumbling or cracked materials already in place. As long as it’s not silicone, sealants already there that are still intact can stay (just make sure they look good and there’s no rot underneath).
Sand down the joints to remove loose, unsound wood fibers. Those wood fibers will interfere with adhesion of other products (yes, including the sealants you’re about to apply).
Stain the joints with a compatible finish. Again, all Sashco stains work with our chinking. (We were thinking ahead!)
Insert backer rod or install another bond breaker. Why? Because your sealant job will last longer, and you’ll use less chinking or caulking. (We’re sure your hands and wallet will thank us.) In joints that are ½” deep or more, use backer rod, Grip Strip™, or another bond breaker. In joints that are less than ½” deep or over top of existing mortar, use clear packing tape in the back of the joint.
Step two: Apply the sealants
A steady hand is imperative, so lay off the caffeine for a bit. Apply no more than 2-3 feet at a time. On wider joints, apply three separate beads — one on either side of the joint, and one down the middle — or use a ribbon nozzle to apply one wide bead at a time.
Smooth (tool) the caulking. As you go along, use a damp foam brush or a spray bottle with a trowel to smooth (tool) the sealant. This ensures proper adhesion and long-term performance. Don’t apply too much at a time! You don’t want the sealant to skin over before you get a chance to smooth it. In hotter temps (above 80°F), a 25% denatured alcohol/water mixture will help slow down the curing to give you more time to smooth things out.

Photo courtesy of Nelson Log Restoration
Step three: Clean up
Use soap and water to clean up skin and tools. Wipe up any milky run-off as you go along with rags. Then, sit back, relax, and enjoy your work.
Pro Tip!
Apply the stain first before applying sealants. Sealants, when smoothed, will create some milky run-off. This run-off will soak into unstained wood and create ugly lines underneath your stain. Avoid this and extra sanding work. Stain first!


 | Sashco")


 | Sashco")

