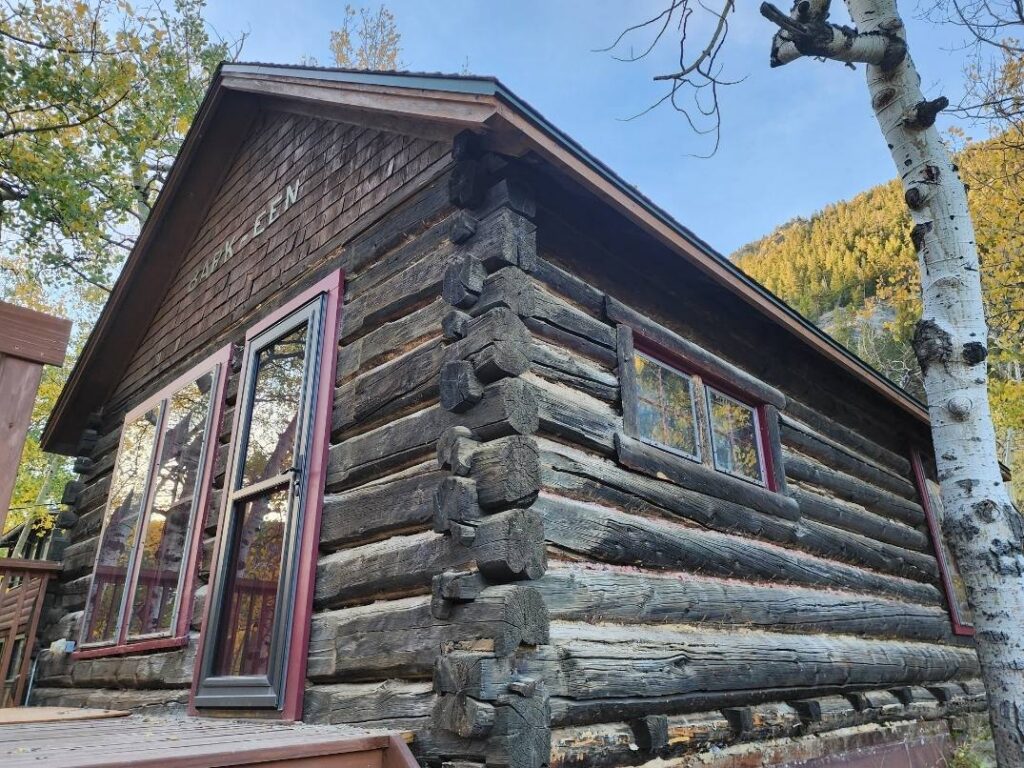
The story behind restoring a 130-year-old Colorado mountain cabin.
High in the mountains near Nederland, Colorado, sits a small log cabin with a long memory. Built sometime around 1890, the cabin originally belonged to a mining family named Barkeen. For decades, it stood high on the mountain while the family worked the nearby mines. Then, in 1950, the structure was moved down the mountain and rebuilt on a new site in 1953.
Seventy-five years later, time had taken its toll.
What followed wasn’t just another log home restoration job. It became a two-month effort to preserve a piece of local history and, in the process, add a new chapter to the cabin’s story.
The Barkeen Cabin Before Restoration Work.
A Cabin Built for Mining, Preserved for History
Today, the cabin belongs to a man named Rich, whose family inherited the property through generations. Although the last name in the family line no longer matches the original Barkeen name on the cabin, the property has stayed within the extended family.
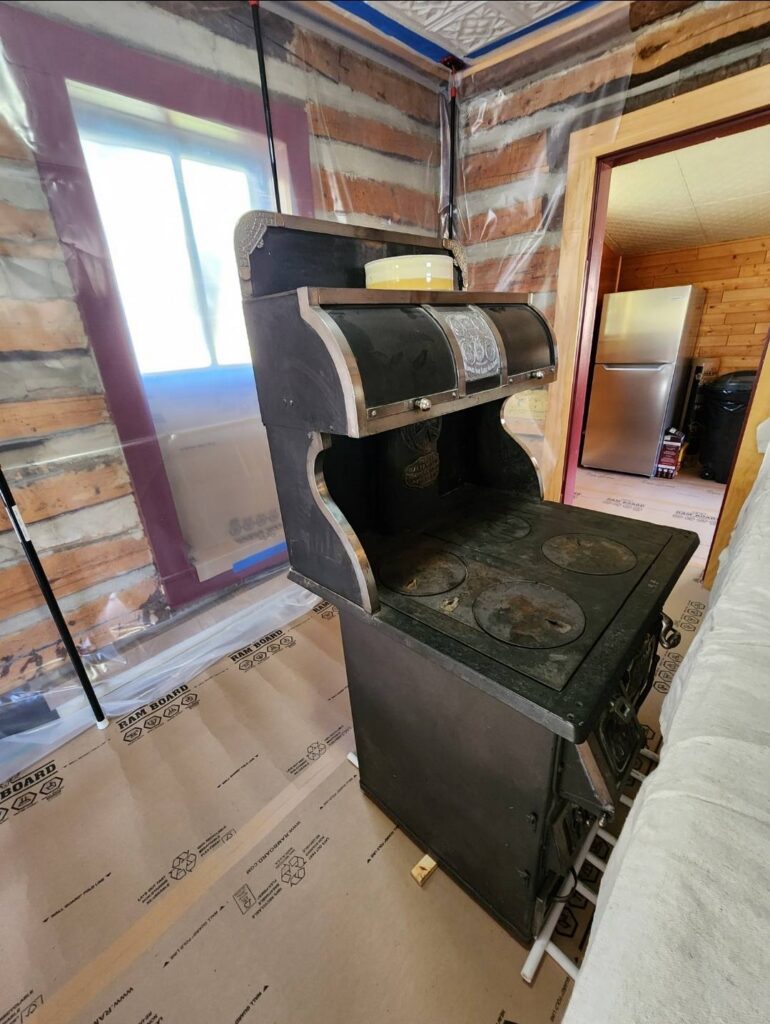
Rich has approached the entire property with a simple philosophy, preserving as much of the original character as possible. Inside the cabin, artifacts from the past fill the space, everything from historical pieces hanging on the walls to a vintage wood-burning stove that still carries its original crest and dates.
If something needs replacing, it gets replaced, but only with careful thought. Many of the people he hired to work on the cabin he describes not just as contractors, but as artists. One welder, for example, built a completely custom handrail for the flagstone path leading from the cabin to the road, something that simply couldn’t be bought in a store.
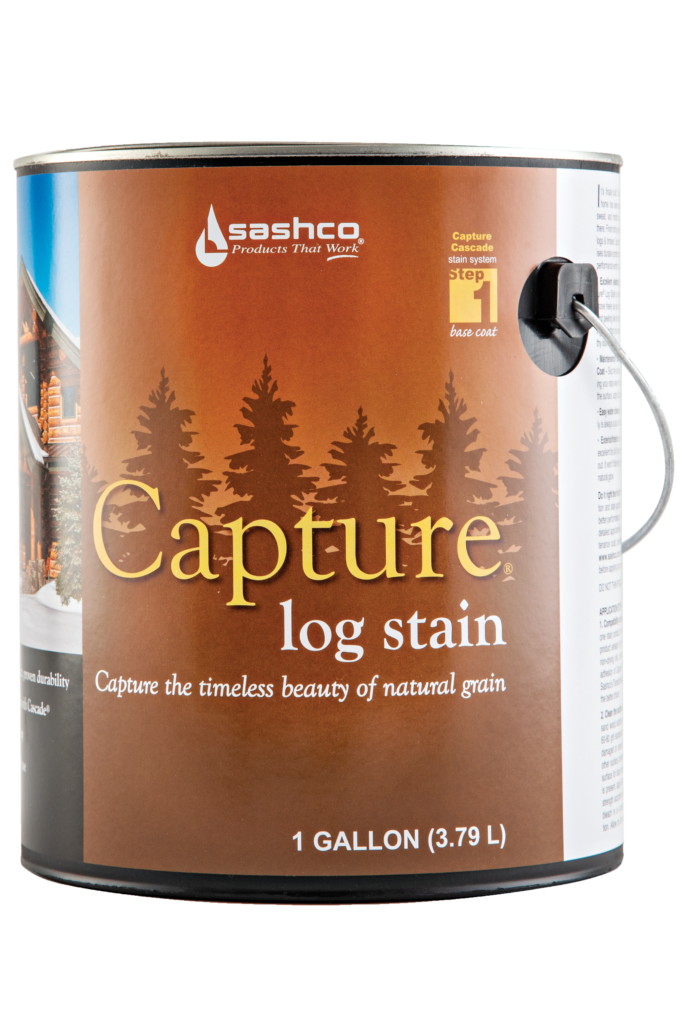
When Colorado Finish, LLC came in to restore the logs, the goal was the same: protect the structure while respecting its history. For the exterior finish, Rich chose Transformation Stain in Gold Tone Light, intentionally selecting a color that would bring the logs as close as possible to their younger appearance while still allowing the natural character of the aged wood to show through.
The goal was never to make the cabin look brand new. Instead, the aim was to honor the structure’s age while protecting it for decades to come.
Digging Out the Past, Literally
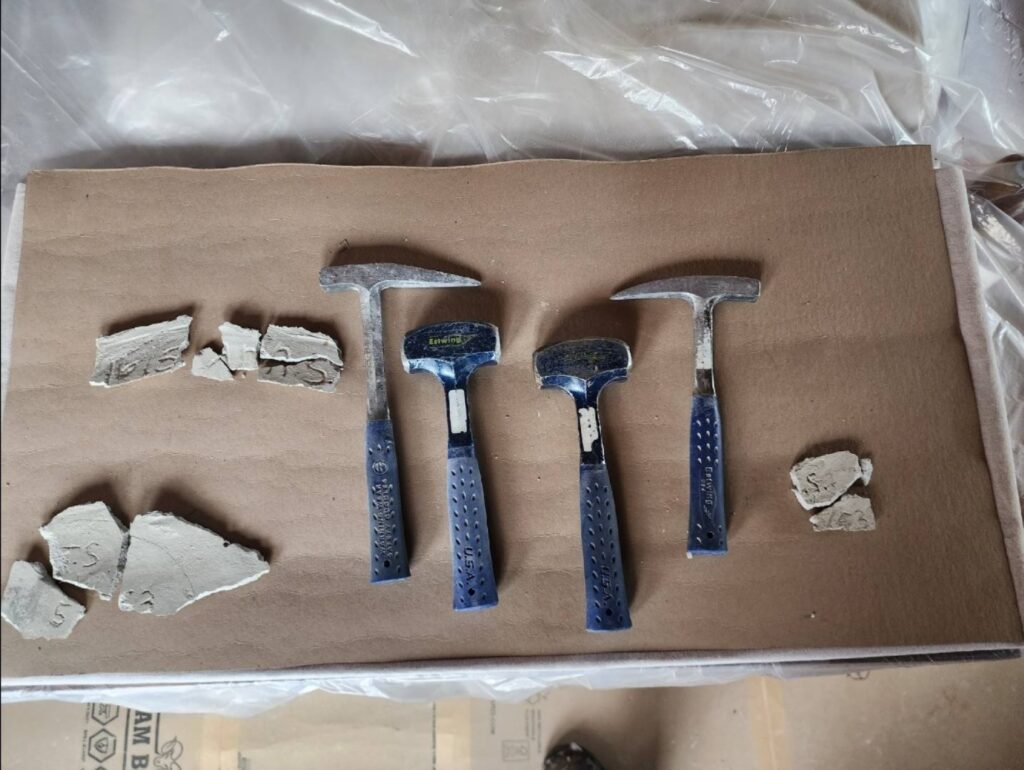
The restoration focused heavily on the cabin’s chinking, the material between the logs that seals the structure. Originally, the cabin used concrete chinking. After decades of weather and movement in the logs, much of it had begun to crack and crumble. Removing it was no small task.
The crew spent weeks carefully chiseling the old material out of the logs. In several places, they discovered something incredibly cool and unexpected, handwritten signatures embedded in the original chinking from when the cabin had been rebuilt in 1953 (Goosebumps? Us, too!).
Pat, who owns Colorado Finish, LLC, understood the resonance it carried. He told us, “I had my pick and chisel, and I was trying to shape around the signatures,” he explained. “But the concrete was so old that a lot of it just crumbled away.” Still, he managed to recover fragments. At one point, he even assembled the broken pieces on a workbench like a puzzle, so the names could still be read.
Those signatures were a small reminder of the people who had worked on the cabin decades earlier, workers whose efforts were now being revisited generations later.
Tools used to carefully work around the original signatures.
When Snow Becomes a Work Tool
The restoration happened in late fall, and the timing turned the project into a well-planned and thought-out winter adventure.
Pat and his crew finished the exterior just before the first snowfall. But when they returned the following week to begin work inside, the mountains had other plans. Two feet of snow had fallen. The cabin was buried.
The crew shoveled their way inside and got to work, but another challenge quickly appeared. They needed to remove piles of old concrete from the cabin interior. Normally, that kind of debris gets hauled away in wheelbarrows or tarps. Not this time. Instead, Pat improvised.
“We actually brought toboggan sleds,” he said. “There was so much snow outside that we were sledding loads of concrete down to the truck.” Chunk by chunk, the old material slid down the hill on sleds before being loaded into the truck and hauled away. It wasn’t the most traditional construction method, but it worked.
And it added a memorable moment to an already unusual job.
The Cabin Earns Its Place in History
After the restoration was complete, the cabin reached an important milestone; it officially received historic landmark status. For Rich, that meant the preservation effort had succeeded.
For Colorado Finish, LLC, it meant something else as well. This was the first officially registered historic landmark they had restored, a personal milestone in a career spent working on log homes.
But the most meaningful moment came when the final work was finished. When Pat discovered the signatures of the workers who rebuilt the cabin in 1953, names that had lasted for generations hidden inside the walls, he added something of his own. He added his own signature.
“I think it’s pretty cool how you can do a job like that,” he said, “where you’re trying to preserve someone’s signature from decades ago, but then you leave your own behind for the future. My signature will be on that wall for at least another 50+years to come and won’t have to be touched.”
Placed on the interior where it will remain protected, his name now joins the earlier builders as part of the cabin’s continuing story.
Some jobs are just construction projects. Others become something more. For Pat, restoring the little Barkeen family cabin wasn’t just about repairing logs and sealing gaps. It was about helping preserve a place that holds generations of memories and leaving a small mark of his own in its long history.
Ready to stain? Don’t guess! Sample. Testing stain colors on your actual logs before committing ensures that you get the exact look you want and helps prevent “oops” moments later. Snag your free samples here.
When it comes to protecting and beautifying your log home, Sashco isn’t just another stain on the market — it’s the high-performancechoice for serious log lovers. With industry-leading products like Capture, Cascade, and Transformation, Sashco combines cutting-edge technology and rugged durability to keep your logs looking stunning and standing strong year after year. Whether you’re chasing that perfect finish or just want to avoid the heartbreak of costly repairs, Sashco’s got your back. Because your log home deserves more than “good enough,” it deserves Sashco. Made for logs. Made to last. Made to make your neighbors jealous.
A weathered log home gets a full structural and aesthetic revival using Sashco’s CPRCleaner, Capture in Mahogany, Cascade Semi-Gloss, and Conceal in Redwood.
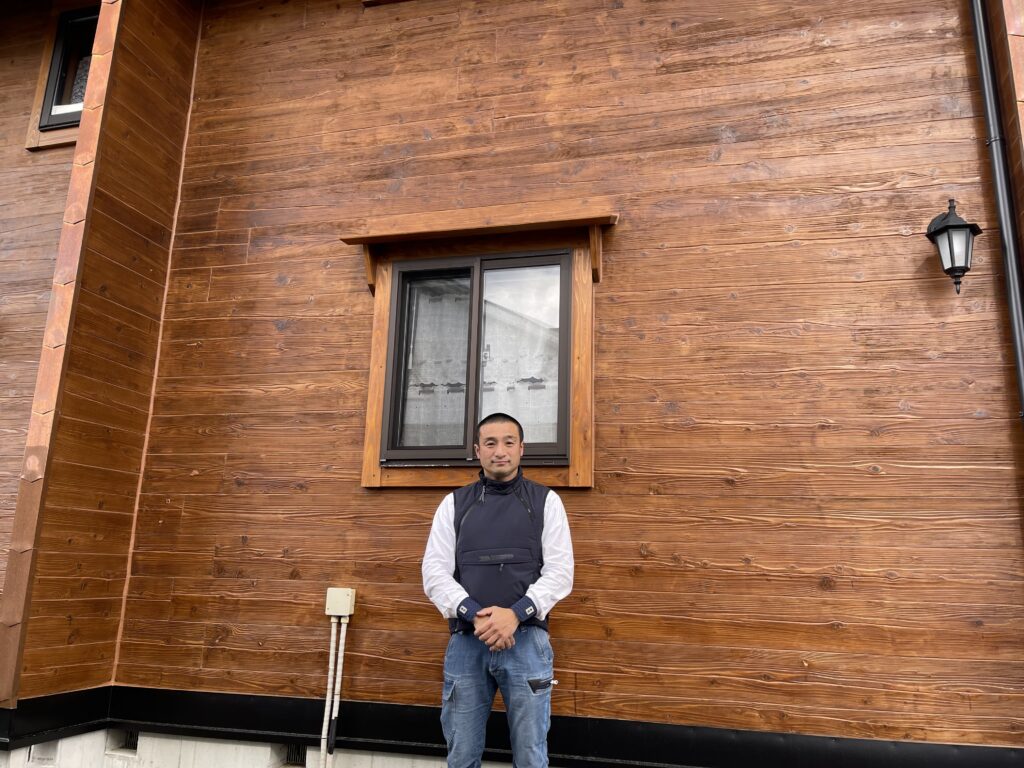
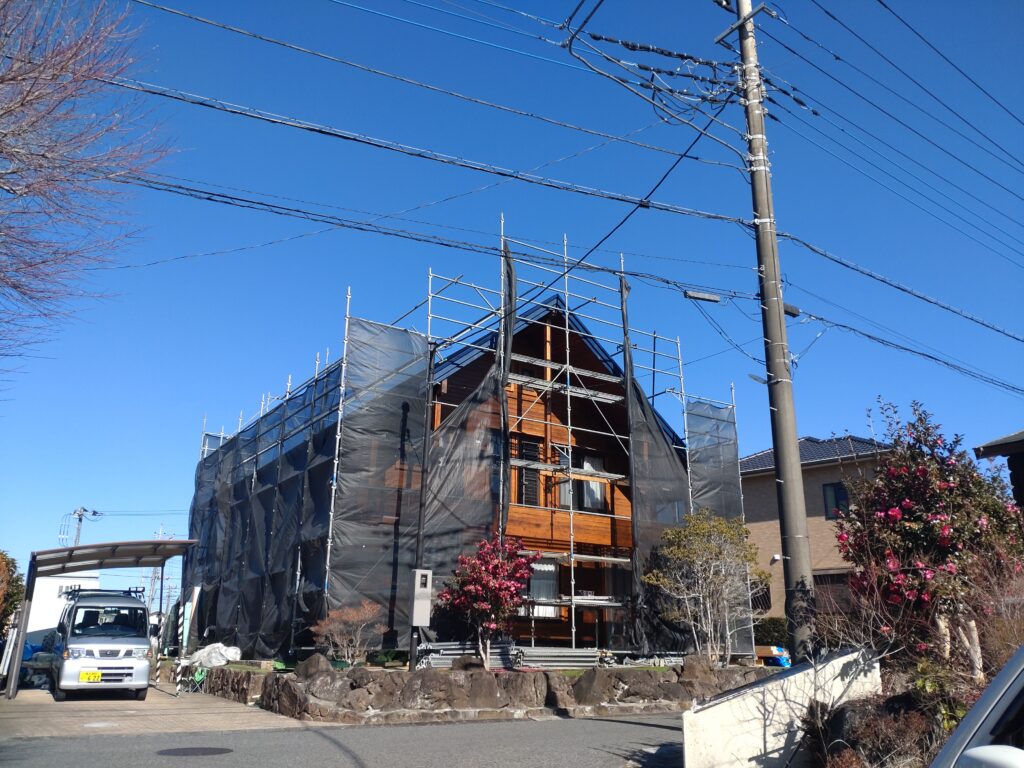
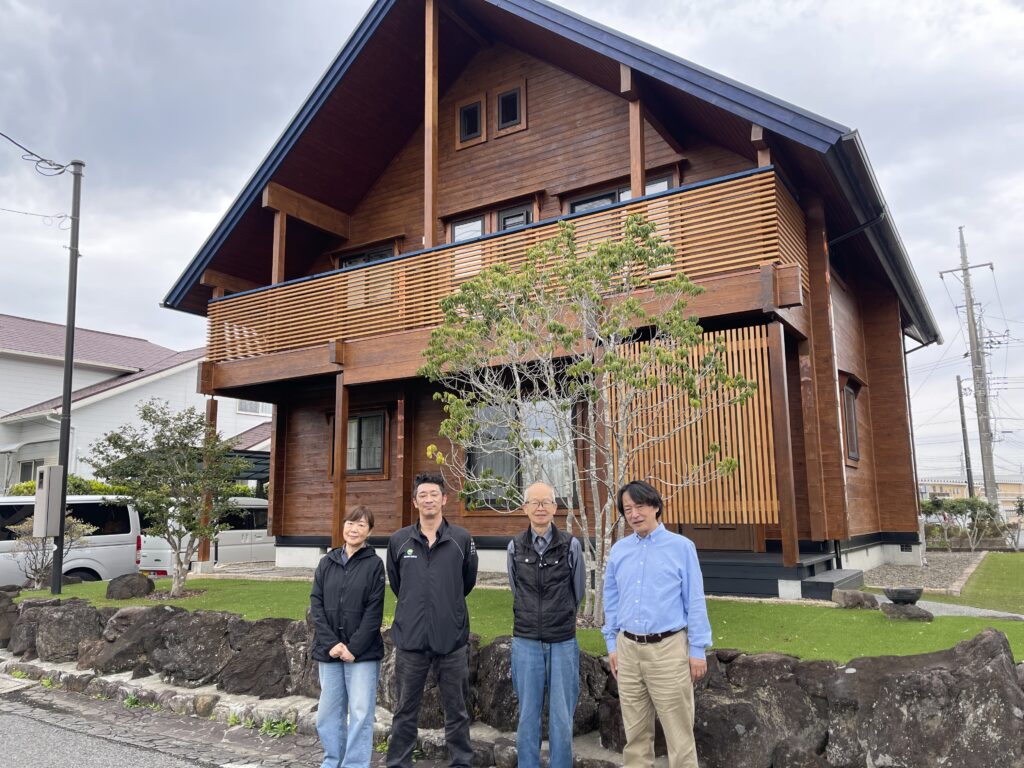
Mr. Murasawa in front of the home
Occasionally, a restoration project comes along that reminds you why wood homes captivate us in the first place: their character, their grain, and the sense that they’re part of a story much bigger than just lumber and nails. That was certainly the case here.
This wasn’t a small facelift or touch-up. This was a total restoration of a weathered log home in Japan. And like so many projects that begin with visible wear and hidden damage, it became a powerful reminder that restoration is possible when you’re willing to do the work the right way.
The project was undertaken by Mr. Murasawa, a contractor who works withNikken-Sogyo, Ltd., a distributor of Sashco’s products in Japan. What started as a mission to improve aesthetics quickly became a full-blown revival of both structure and testing the soul.
Days of Weather, Wear, and Water
By the time the restoration team arrived, years of exposure had taken their toll. Old coatings had failed. Log connections and notched joints were letting in rainwater. Sealants had deteriorated. Some log sections were so compromised that they needed replacement outright.
This is the moment many owners wonder if a home is simply too far gone. But time and again, we see the same truth play out: with effort and the right techniques, rarely are they beyond hope.
The original caulking had failed, which lead to interior water staining. The exterior stain was faded and there was significant mold growth on the surface. This home needed some SERIOUS TLC.
Deep Surface Prep
The first major task was preparing the wood itself (and this was serious work).
To start, existing coatings were stripped off using a #120 nylon brush with wheel sanders and grinders. But this wasn’t just about removal. By sanding perpendicular to the grain, the team enhanced the natural log texture, removing softer earlywood and revealing the denser latewood beneath. The result? A beautiful uzukuri (means wire-brushed, also, a super cool word) texture that made the grain stand out in a way that typical sanding by hand never could.
Aside from aesthetics, this uzukuri surface also improved the mechanical adhesion of the Capture and Cascade, which is a crucial foundation for any lasting restoration. When the surface is right, everything that follows works better.
Over One of the biggest challenges uncovered during the restoration was rainwater intrusion at critical joints, openings, and connections. Instead of patching the symptoms, the team went after the cause (because we’re not into Band-Aids).
All old sealants were carefully removed, and deteriorated logs were replaced where needed. At the log end grain sections, new wooden backing was installed and wrapped in copper sheeting designed to echo the look of tree bark (off-the-charts cool factor). Not only was that an aesthetic dream, but it was also a solution that improved waterproofing while staying visually true to the surrounding logs.
For the inevitable checks and cracks in the logs, Sashco Concealin Redwood was used to fill and seal to leave a natural, seamless finish that blended into the wood.
This kind of work isn’t flashy, but it’s exactly what makes long-term success possible. Fix what’s wrong, respect the structure, and move forward knowing restoration really is possible.
The Look and Protection Combo
Now for the part people really notice. The color!
The team chose Sashco’s Capturein Mahogany. The color is a rich, deep tone that highlights the wood’s natural grain while offering excellent UV and weather protection. The color brought warmth and depth back to logs that had seen years of hard exposure.
Once the stain was applied and dried, Cascade Clear Coat in Semi-Gloss was added as the clear topcoat. This final layer enhances color clarity and sheen while providing long-term resistance to moisture and weather, helping ensure this restoration lasts for years to come.
What Happens Next?
True restoration doesn’t end when the last coat dries.
A future-focused maintenance plan was put in place with annual inspections, prioritizing areas previously affected by decay and those most exposed to wind and rain. By watching these areas closely over time, small issues can be addressed early, keeping the home protected and the envy of all the neighbors, year after year.
This project was never just about products. It was about commitment. Commitment to doing the work thoroughly, respecting the original structure, and choosing systems designed to work together over time.
With careful surface preparation, thoughtful structural repairs, and the combined use of Conceal (Redwood), Capture Log Stain in Mahogany, Cascade in Semi-Gloss, and CPR Cleaner, this home didn’t just get a second chance. It became one more real-world example that with the right approach, the right products, and the right people, restoration truly is possible.
Home during restoration processFinished home. Standing from left to right is Nori from Nikken, Tomoji from Nikken, Mr. Nishiuchi the Homeowner, and Nozomu from Nikken
Ready to stain? Don’t guess! Sample. Testing stain colors on your actual logs before committing ensures that you get the exact look you want and helps prevent “oops” moments later. Snag your free samples here.
When it comes to protecting and beautifying your log home, Sashco isn’t just another stain on the market — it’s the high-performancechoice for serious log lovers. With industry-leading products like Capture, Cascade, and Transformation, Sashco combines cutting-edge technology and rugged durability to keep your logs looking stunning and standing strong year after year. Whether you’re chasing that perfect finish or just want to avoid the heartbreak of costly repairs, Sashco’s got your back. Because your log home deserves more than “good enough,” it deserves Sashco. Made for logs. Made to last. Made to make your neighbors jealous.
Here We Go…
Every fall and again in early spring, the phone starts ringing.
Homeowners and contractors alike are racing the calendar. Some are trying to wrap things up before winter really settles in. Others are itching to get started because the sun is finally shining again. And almost every conversation begins with the same question, “How cold is too cold to chink or stain my log home?”
The honest answer is this: it’s not just about the air temperature. It’s about the surface temperature of the logs, the product’s temperature, and how well the work is protected during curing. Ignore any one of those, and you’re not just cutting corners. You’re taking a real risk on a costly redo.
The Biggest Danger Is the Wash-Out
When it comes to chinking and sealants, the greatest cold-weather threat is wash-out.
In normal temperatures, chinking skins over fast enough to withstand a light rainstorm. But cold weather dramatically slows the curing process. If rain hits before the material has had time to firm up, it can literally wash a beautiful joint right down the wall.
That’s not just frustrating. We’re talking days of lost labor, wasted material, and a mess that’s nigh on impossible to just clean up. Cold temperatures won’t always “ruin” the product itself (although that’s also a risk!), but they delay when it becomes weather-resistant, and that delay is where the danger lives.
Wash-out doesn’t just mean reapplying. It often means cleaning residue off logs, re-prepping joints, and explaining unexpected delays to the homeowner. In cold weather, one storm can undo several days of work.
Surface Temperature Matters Just As Much As Air Temperature
One of the most misunderstood aspects of cold-weather application is that the log’s surface temperature matters just as much as the air temperature.
On a 40°F day, sun exposure can push log surface temperatures well over 100°F. On the other hand, a cloudy 45°F day after freezing weather can leave logs far too cold for proper adhesion. A good, simple rule of thumb is that you want a surface temperature of at least 40°F (and rising) and no more than 90°F (and falling) before you even think about applying chinking or stain. Use an infrared thermometer and check it often. Guessing isn’t good enough when the stakes are this high.
Air temps matter, too. Even if your logs are warm during a 45°F day, they’ll drop pretty dramatically at the end of the day and overnight. So, overnight air temps need to be 40°F or better for a minimum of 2 days after products have been applied.
Keep the Product Warm, Not Just the Logs
Cold chinking is thick, sluggish, and difficult too. Worse yet, when it’s too cold, it can struggle to adhere properly to the surface.
A trick many experienced pros rely on is storing their materials in a small room or closet inside the structure, sometimes with a small space heater. You don’t need a sauna; just enough warmth to bring the material itself up to 80–85°F.
One tricky thing to remember, though, is that bringing a five-gallon pail from 35°F up to working temperature can take several days, not a couple of hours. Planning ahead here makes all the difference. Forcing cold material to work faster often leads to uneven joints, poor tooling, and inconsistent appearance. Even if it sticks initially, long-term flexibility and performance can be compromised. It’s just not worth it.
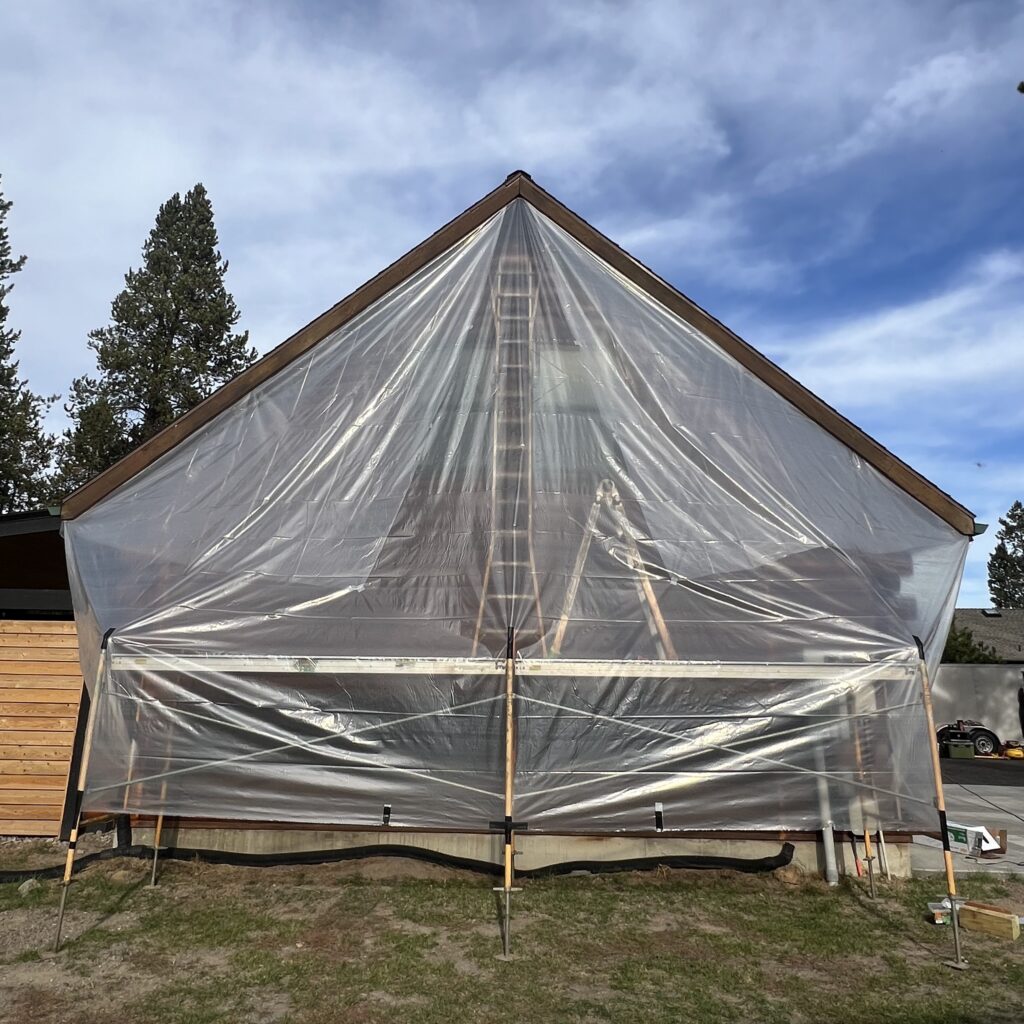
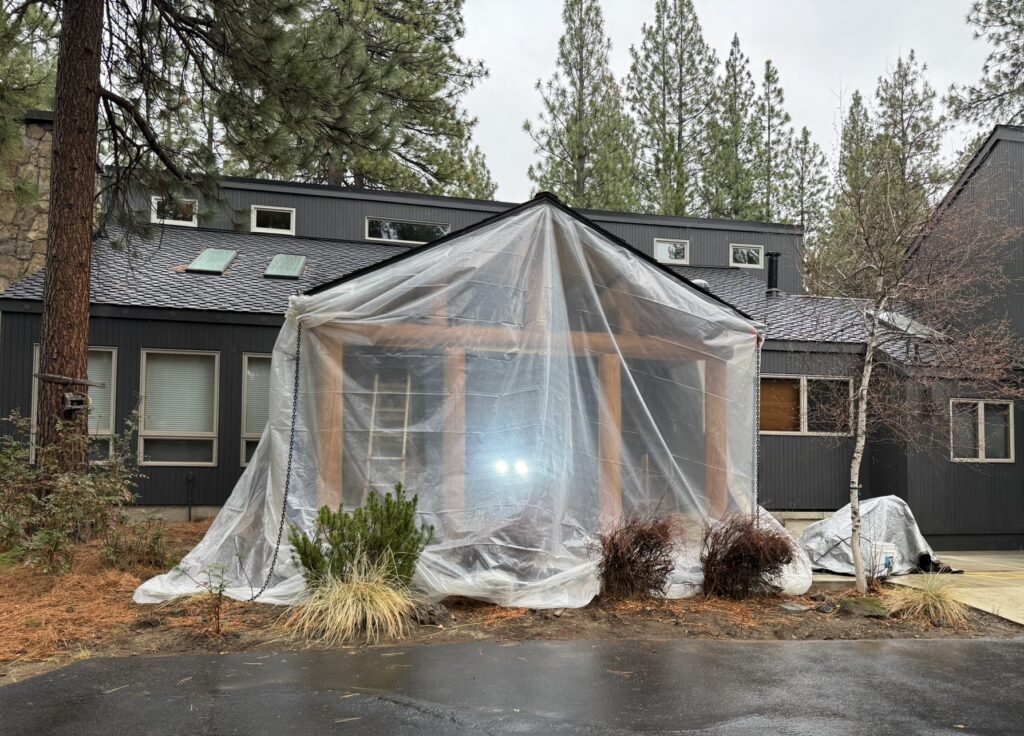
Tenting and Heating Are Often the Real Secret to Success
In cold weather, tenting isn’t optional. It’s what makes proper application possible.
Clear plastic sheeting works exceptionally well because it traps solar heat, lets in natural light, and creates a controlled environment around the work area. But tenting alone isn’t enough.
You also need air circulation. Without venting, moisture can build up on the logs and cause condensation, which can lead directly to the same wash-out you’re trying to prevent. This is important because tenting isn’t just about temperature, it’s about stability. Consistent conditions allow products to cure as designed, reducing callbacks, repairs, and long-term failures that are often blamed on the product instead of the environment.
Done correctly, tenting and heating protect both the material and the craftsmanship behind it.
Mother Nature doesn’t always cooperate, so we adapt without compromising quality. Proper tarping, airflow, and heat management ensure coatings bond correctly even in cold-weather applications. Photos courtesy of Knaughty Log
Official Cold-Weather Guidelines for Log Jam
We like to have fun around here, but when it comes to pushing cold-weather work, that’s when we get serious. The instructions for Log Jam are clear for a reason.
To safely apply Log Jam in cold weather:
Log surfaces must be above 40°F (4°C). Always confirm with a surface thermometer.
Air temperatures must be above 40°F, as well
Keep chinking warm until it’s ready to use
Logs must be completely free of frost (frost prevents adhesion)
Tent the area with clear plastic and heat it before and during application
Provide air circulation to prevent condensation
Leave the tent and heat in place for 2–4 days after chinking (use the full 4 days for wider joints)
Then remove the tenting to allow normal curing
Here’s the reality check. In cold weather, Log Jam will take much longer than usual to fully cure. Don’t go out there and test the limits. Removing protection too early is one of the most common cold-weather mistakes. Even if the surface feels firm, the material underneath may still be vulnerable to damage from cold, moisture, or movement. Trust us on this one!
What About Staining?
Many of the same principles apply to stains like Capture Log Stain and Transformation Stain.
Cold temperatures slow everything down:
Cold wood slows (and can even prevent) penetration and adhesion
Cold stain doesn’t flow or level as well
Curing takes much longer
Uncured stain can remain tacky
Keeping the stain warm, monitoring surface and air temperatures, and using tenting and heat, when necessary, can make cold-weather staining successful, especially with water-based products.
Don’t Be Fooled by “Freeze-Thaw Stable”
You’ll see FREEZE-THAW STABLE printed on many pails, including most of ours. That does not mean the product can sit outside all winter. Most materials are rated for around 5 freeze-thaw cycles. In one winter, it’s easy to hit fifteen or twenty cycles without realizing it.
Always store products where they won’t repeatedly drop below 32°F. Replacing damaged material is expensive and completely avoidable.
Yes, you can chink and stain in cold weather. But success depends on respecting the process:
Surface and air temperatures above 40°F both during application and for 2-4 days afterwards
Warm product
Proper tenting and heat
Protection from rain and snow
And patience with slower cure times
If you can’t provide those conditions, the smartest move isn’t to push harder. Work smarter, not harder, just wait for warmer conditions! At the end of the day, no deadline, no schedule, and no “almost done” feeling is worth watching your work slide down the wall after the first cold rain.
So, the question isn’t whether chinking or staining can be done in cold weather. It’s whether it can be done correctly. If you can’t meet the temperature and protection requirements, waiting isn’t a setback; it’s the most cost-effective decision you can make. Take a deep breath and get something hot to drink instead. You’ll be glad you did.
Ready to stain? Don’t guess! Sample. Testing stain colors on your actual logs before committing ensures that you get the exact look you want and helps prevent “oops” moments later. Snag your free samples here.
When it comes to protecting and beautifying your log home, Sashco isn’t just another stain on the market — it’s the high-performancechoice for serious log lovers. With industry-leading products like Capture, Cascade, and Transformation, Sashco combines cutting-edge technology and rugged durability to keep your logs looking stunning and standing strong year after year. Whether you’re chasing that perfect finish or just want to avoid the heartbreak of costly repairs, Sashco’s got your back. Because your log home deserves more than “good enough,” it deserves Sashco. Made for logs. Made to last. Made to make your neighbors jealous.
Running a log home restoration company isn’t for the faint of heart. Log Masters Restorations has spent over a decade in the trenches, turning hard-earned experience into a system that actually works. Read on to see how their team’s lessons can help other businesses work smarter, not harder.
Why Log Home Restoration Businesses Need Specialized SOPs
Nick Smith, Dawn Smith, and Scott Futrell, have been in the log game since 2011, officially starting Log Masters Restorations in 2016. From the start, they realized that general construction knowledge wasn’t enough. Log homes are a different animal. They come with unique maintenance and restoration needs that require specialized knowledge.
“You actually need to know a little bit more about the nuances of log home restoration and maintenance repair, because they’re completely different than a conventional home,” Dawn explains.To build that knowledge, they dove into training, attending Sashco’s Zero Failures courses, both the Wood Science and the Business Focus. For Dawn, a self-proclaimed science nerd, the deep dive into how stains interact with wood was a blast. But beyond chemistry, the course offered practical, real-world advice for running a log home restoration business without losing your hair.
The Big Takeaway? Create Standard Operating Procedures
After leaving Zero Failures, one of the most obvious lessons Dawn and her team took away was the importance of having a standard. They got a vision and were determined to create what became their SOP (Standard Operating Procedures). With branches in Texas, Missouri, and Colorado, and crews traveling across regions, a clear standard wasn’t just a nice, “we’ll get around to it sometime,” kind of thing. It was absolutely necessary.
“If you don’t set up some kind of standard, you’ll have chaos. One guy does it one way, another guy another way, and suddenly you’ve got arguments on-site. The SOP keeps everyone on the same page,” Dawn says.
Starting small, they began drafting a simple SOP in 2021. Over time, it evolved into a comprehensive guide built from 15 years of experience, legal counsel advice, and industry insights. The SOP now helps onboard new crew members, standardize paperwork, and maintain high-quality work.
How Log Masters Documented Field Knowledge into Procedures
Building an SOP isn’t just about writing things down, it’s about capturing real-world knowledge and keeping it practical. We asked Dawn to share how they documented new insights from the field. Here are her tips (Aka, gold! Don’t sleep on this. These are tips that work!)”
1. How did you document new things from the field?
“In the beginning, our documentation system was very simple: Gmail, the HubSpot mobile app, QuickBooks Online, and one shared OneDrive account. Technicians would send photos and notes from their jobs each evening, and I would organize everything into reference material,” Dawn explained.
Over time, this evolved into educational blogs for their website and eventually expanded into a full documentation process using Gmail, QBO, HubSpot, and SharePoint for management, while technicians continue to use Gmail and Google Docs for quick updates.Dawn also spent time researching outside the company, reading Sashco’s blogs, industry articles, and monitoring Facebook log-home restoration groups daily. Initially for marketing, it became an incredibly helpful way to observe how others answered technical questions. Later, she worked in the field for a winter season to better understand challenges firsthand, documenting the nuances that formal training often misses.
2. Who was in charge of putting the SOP together?
Dawn led the creation of the SOP, but it could not have been built without Scott and Nick. They contributed years of field experience, solutions to unforeseen issues, and deep contract knowledge collected over the last 10–13 years. Their experience forms the backbone of much of the technical accuracy. Feedback from technicians and field staff also shaped the SOP. As the company grew, Dawn developed SOPs for new management positions as well. The SOP system is truly the combined result of the company’s lived experiences, lessons, and continuous learning.
3. How many reviews did it undergo?
The SOP system has just recently been completed, and 2025 marks their first formal company-wide review cycle. The week before Christmas, all LMR staff will review the Technician SOP together to finalize revisions before 2026.
4. Who’s responsible for reviewing and updating them regularly?
Dawn currently oversees all SOPs and will continue maintaining them with input from the management team. Each manager and staff member is responsible for reviewing their own SOP and suggesting edits. The company values employees’ insights, and their experience guides revisions over time.
As Log Masters Restorations grows, staff see how their contributions also advance their own careers and help shape a workplace that values feedback, perspective, and boundaries. The 2026 KPI process will measure how effectively the SOPs work, whether they’re actively used, and where improvements are needed as products and techniques evolve. SOPs are only effective if they’re used, and KPIs provide real data, not assumptions.
The long-term goal is to stabilize the structure, strengthen what already works well, and ensure no one gets complacent as the company grows. Over time, this system will be passed on to the next generation of leadership.
Practical Advice for Contractors
Log Masters Restorations is generous with their tips for anyone building their own SOP or looking to improve operations:
Start with the basics – Focus on the core tasks for each log home project before expanding to more complex scenarios.
Document scenarios and solutions – Keep track of challenges you encounter and how you solve them. This becomes the foundation of your SOP.
Engage your team – Field staff may have practical insights that don’t show up on paper. Their feedback ensures that procedures are realistic and effective.
Be proactive, not reactive – An SOP isn’t just a guide; it’s a tool to anticipate issues and prevent costly mistakes (ahem, like broken specialty windows, more about that to come).
Patience is key – Mistakes will happen. Even after 15 years, new situations arise. Take time to adjust and refine your approach.
Case in point: a $10,000 specialty window destroyed during media blasting. Ouch. Expensive? Yes. Avoidable? Absolutely, thanks to covering windows with Ram Board going forward (now a standard part of their SOP). “Mistakes are opportunities to improve,” Dawn notes (and occasionally, to start questioning every life choice you’ve made before 10 a.m.).
The benefits of the SOP are tangible. Better structural organization, consistent recordkeeping, fewer callbacks, and smoother client communications (Who would take a hard pass on that? Nobody? We thought so.). The proactive approach ensures the team is prepared, and clients are satisfied. They even credit it for helping maintain the company’s five-star reputation.
Their Advice to Others
For Log Masters, the key to long-term success is simple: start small, document everything, engage your team, and be patient. Training, like the Zero Failures course, and collaboration with industry peers help build knowledge, while the SOP keeps it practical and actionable.
“Be patient with yourself. There’s always a new scenario, even after 15 years. Engage others in the industry, and don’t be afraid to ask for help. Start small, keep records, and let your mistakes teach you. That’s how you build something that works,” she says.
Building a successful log home restoration business isn’t just about skill. It’s about strategy, patience, and learning from every single project. Log Masters Restorations proves that taking the time to document, standardize, and actually involve your team isn’t overhead. It’s not busy work, and it’s definitely not a waste of time. It’s an investment that actually pays off. For contractors looking to level up, their story is a solid reminder that the right system doesn’t just keep chaos and wasted dollars at bay, it builds a smoother, smarter, and more profitable operation that can handle whatever a job throws your way.
Ready to stain? Don’t guess! Sample. Testing stain colors on your actual logs before committing ensures that you get the exact look you want and helps prevent “oops” moments later. Snag your free samples here.
When it comes to protecting and beautifying your log home, Sashco isn’t just another stain on the market — it’s the high-performancechoice for serious log lovers. With industry-leading products like Capture, Cascade, and Transformation, Sashco combines cutting-edge technology and rugged durability to keep your logs looking stunning and standing strong year after year. Whether you’re chasing that perfect finish or just want to avoid the heartbreak of costly repairs, Sashco’s got your back. Because your log home deserves more than “good enough,” it deserves Sashco. Made for logs. Made to last. Made to make your neighbors jealous.
Some homes are built on land. Others are built on stories.
Before a single log was stacked, before stain colors were debated or chinking lines were planned, this property already mattered. A lot. It’s where Jerry Fekete spent his younger years training as a competitive road bike racer, pedaling the roads that wind through the countryside. Years later, after life took him to other states, he returned with his wife, Jennifer, showed her the land, and she fell in love with it too.
They didn’t just choose this property for their future log home. They chose it for their wedding.
They were married right there on the land, before the house existed, and then decided to build a log home that honored the place, the past, and the future they were creating together.
Jeffus was first contacted by the homeowners in 2023, referred by Sashco’s own Paul Peebles. The home had already been stacked. Unfortunately, Mother Nature didn’t get the memo about timelines.
Monsoon-like weather delays meant the roofing crew couldn’t get the roof on in time, leaving the logs exposed to prolonged rain and heat. As you can imagine, that combination led to staining and mildew, inside and out.
At the same time, Jerry and Jennifer were living in another home while slowly completing this one themselves, carefully working within a yearly budget and doing as much hands-on work as possible. (Both engineers, both extremely detail-oriented, and yes, every bit as meticulous as you’d expect.)
The goal wasn’t just to “fix” the damage. It was to do it right.
Prep, Patience, and a Custom Vision
The homeowners had a clear vision: A custom color blend using Capture Log Stain in Chestnut and Hazelnut, paired with Log Jam Woodtone Cedar chinking. Rich, warm, timeless, but precise.
Every non-log wood surface was sanded with 60-grit to remove mill glaze and properly prep for stain. The logs were treated with CPR Log Cleaner, pressure-washed and then treated with borates for long-term protection.
From there, Jeffus applied Colorfast Pre-Stain Base Coat, followed by a first coat of Chestnut Capture Log Stain and a second coat in Hazelnut. Window trim, fascia, rafters, and deck railings were stained to match the logs, while the board-and-batten siding was finished in Capture Log Stain Natural. Cascade Semi-Gloss went on last to protect all exterior wood surfaces, including the T&G soffits, and Conceal was used to address checking and cracks.
This was about restoring confidence in the home and setting it up to last.
Bringing the Story Inside
In 2024, the Jeffus crew returned to focus on the interior. Upper-level log-look siding was installed, sanded to 80-grit, along with the upstairs tongue & groove ceilings and beams. Interior logs were carefully sanded to remove mildew damage and prepped for stain.
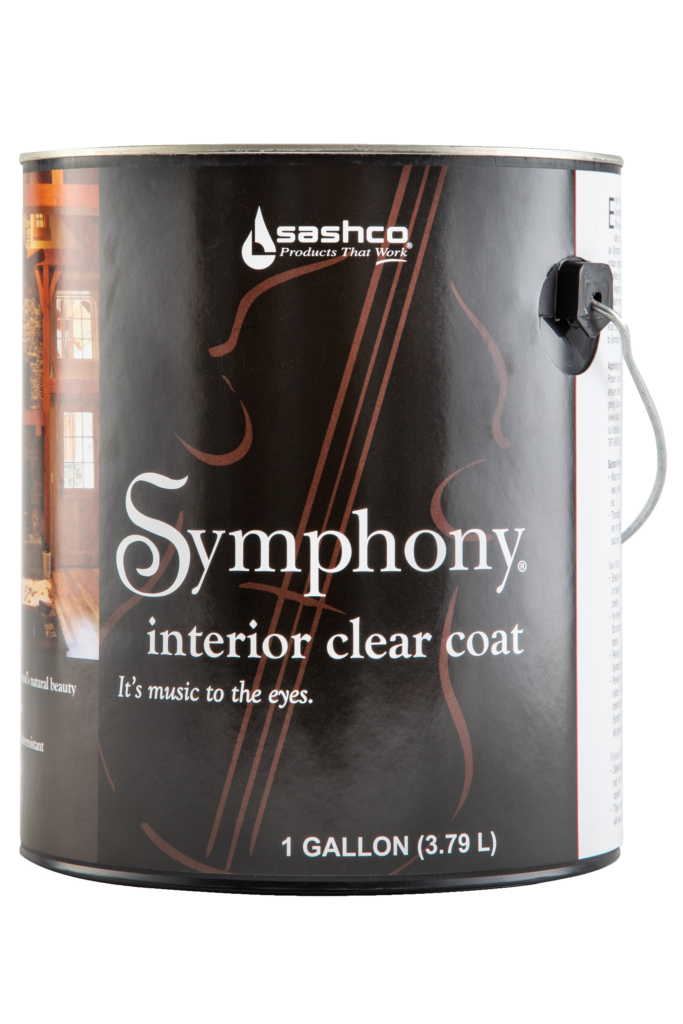
The interior color choice (it deserves a pause, yes, it’s that beautiful), Capture Autumn Aspen,completely transformed the space. Warm, inviting, and perfectly balanced. All interior wood surfaces were sealed with Symphony Interior Clear Coat for durability and depth.
That same year, the deck was sanded and stained using Transformation Stain Siding & Trim in Woodtone Cedar, tying the outdoor spaces seamlessly into the home’s natural surroundings.
The Details That Matter (Especially to Engineers)
By 2025, it was time for exterior chinking. Log Jam was installed, followed by stain correction, touch-ups, and a fresh, clear coat to seal and protect everything, including the chinking itself.
Interior work continued with first-floor log-look siding, and plans were set to stain the downstairs interior walls to match the rest of the home. Window trim and additional interior details are still ahead.
Over the coming winter, oak flooring will be installed, more interior siding added, and Jeffus will continue helping Jerry and Jennifer tackle the remaining projects with one shared goal in mind: moving in by spring of 2026.
A Home Rooted in Place
Jeffrey Jeffus, owner of Jeffus Log Home Stain & Service, told us, “One of the best parts of working on this home is how connected it is to its surroundings. Harmony Hill Market at Bryant-Thomas Ranch sits just next door, and when we’re on site, we grab beef, pork, and chicken from their little ranch store. All grass-fed, humanely raised, and literally within walking distance of the driveway. It feels right. Like the house belongs here.”
This isn’t just a log home. It’s a lifetime of memories coming full circle. Built with intention, patience, and a whole lot of care.
Jerry and Jennifer, we’re honored to be part of your story.
Ready to stain? Don’t guess! Sample. Testing stain colors on your actual logs before committing ensures that you get the exact look you want and helps prevent “oops” moments later. Snag your free samples here.
When it comes to protecting and beautifying your log home, Sashco isn’t just another stain on the market — it’s the high-performancechoice for serious log lovers. With industry-leading products like Capture, Cascade, and Transformation, Sashco combines cutting-edge technology and rugged durability to keep your logs looking stunning and standing strong year after year. Whether you’re chasing that perfect finish or just want to avoid the heartbreak of costly repairs, Sashco’s got your back. Because your log home deserves more than “good enough,” it deserves Sashco. Made for logs. Made to last. Made to make your neighbors jealous.
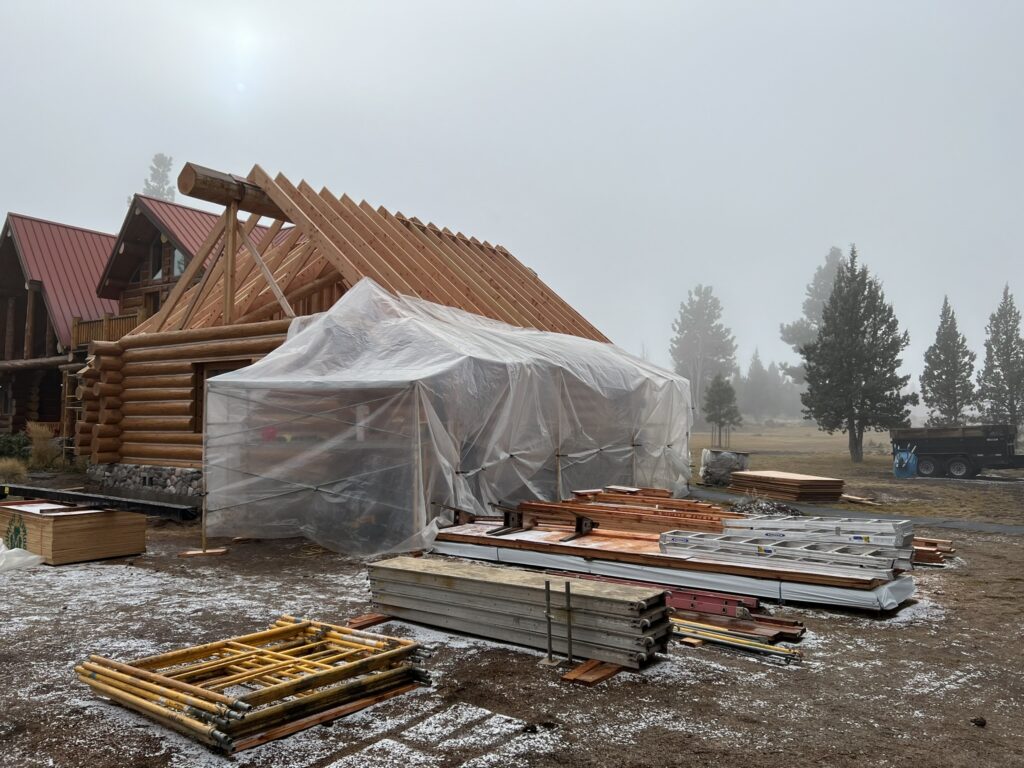
When most contractors turned down the job, Alex Bowman said yes.
The project? A massive, weathered Swedish-style log cabin restoration perched 10,000 feet up in the rugged canyons above Oakley, Utah. We’re talking remote! Miles of dirt roads from civilization and way beyond cell service.
For most contractors, it was too far removed, too risky, too rough. But for Alex, founder of Elk Country Paints, it was precisely the kind of challenge that fuels him.
“I live in the forest most of the time,” Alex said. “That’s where I belong. I built a service that helps people who can’t find anyone willing to go out and do the job.”
From a “Simple Roof” to a One-Man Mountain
The project started with what seemed like a straightforward task. It didn’t take long for Alex to realize that there was nothing straightforward about it. The homeowners wanted him to repaint a steep, intimidating metal roof (like, legit scary).
It was a tough ask to begin with, but within days, the crew bailed, leaving Alex to finish the job solo. For everyone else, it was too much. For him? Just another challenge to conquer.
The project tested him to his limits, both physically and mentally. Long days on the roof turned into sleepless nights, fighting pain and exhaustion. But he didn’t quit.
“It was probably the most difficult thing I’ve ever gone through in business and life,” Alex said. “But I never gave up. I feel like I earned that home.”
That perseverance didn’t go unnoticed. Impressed by his commitment, the homeowner asked Alex to take on the entire log restoration itself (initially just a “clear coat,” but as every pro knows, it’s never just a clear coat).
The Reality of Remote Log Home Restoration
By the time Alex returned the following year to tackle the home’s complete log restoration, he once again found himself without a crew. “The work is grueling”, he explains. It’s long hours, heavy labor, camping out when hotels are too far away, and the mental grind that breaks many before the job is done. But for Alex, that hardship is part of what makes the work meaningful.
“People call me crazy, but I talk to homes. They tell me what they need. I build a personal relationship with the home,” he said. “When I came back to that cabin, it felt like it had accepted me.”
Weathered Wood to Cascade Finish
Alex began by washing the logs withCPR Cleaner & Brightener, cutting through years of dust and mountain exposure. Sun-beaten walls received extra attention, and from there he went to work with his preferred method, sanding with a pneumatic orbital sanderusing 40–60 grit, a process he swears by for achieving smooth, even results (mad respect from us for that!). “I know there are faster ways, but nothing does the job like a pneumatic orbital sander,” he said.
While washing, hidden log rot revealed itself (we’re looking at you, rail posts). Those areas were rebuilt using putties, which Alex calls one of his favorite parts of the job. “It’s like a work of art trying to match what’s there,” he said. “When I’m done, I can’t believe how much it matches the contour of the original log.”
Finally, the home was finished with Cascade Clear Coat, applied in two coats on areas that needed extra protection from the intense mountain sun. “Some of those walls were so sunburned they were just drinking it up by the gallon,” Alex explained.
Looking Ahead: A Long-Term Log Home Maintenance Plan
Alex and Elk Country Paints continue to work with the homeowner on a long-term maintenance plan, because no one wants to go through another complete restoration when simple upkeep can preserve a log home’s beauty and protection for years. “We’d never want to see someone have to restore when it’s so easy to maintain your project,” Alex said.
The Alpine House stands today as one of his proudest accomplishments, not just for its stunning view of the Uinta Mountains, but for what it represents: perseverance, craftsmanship, and heart.
A Passion for the Craft
Alex credits much of his continued passion and growth to his connection with Sashco at Zero Failures to the hands-on education he’s gained through our team (we’re not blushing; you’re blushing).
“When I use your products, I can hear Jim from Sashco talking in my head,” he said with a laugh. “It just lights a fire in me ten times more. You can’t fake that kind of passion.”
In the end, for Elk Country Paints, the Alpine House story isn’t just about logs, stains, and perseverance, it’s about heart and one determined craftsman who refuses to quit. Add to it a homeowner who believed in him, a log home that found new life high in the mountains where few dare to go and you have the makings of an epic success story.
For log homeowners, it’s a reminder of what’s possible when you care for your investment with the right products and people. For fellow pros, it’s proof that true craftsmanship still thrives one crazy-tough project at a time.
Ready to stain? Don’t guess! Sample. Testing stain colors on your actual logs before committing ensures that you get the exact look you want and helps prevent “oops” moments later. Snag your free samples here.
When it comes to protecting and beautifying your log home, Sashco isn’t just another stain on the market — it’s the high-performancechoice for serious log lovers. With industry-leading products like Capture, Cascade, and Transformation, Sashco combines cutting-edge technology and rugged durability to keep your logs looking stunning and standing strong year after year. Whether you’re chasing that perfect finish or just want to avoid the heartbreak of costly repairs, Sashco’s got your back. Because your log home deserves more than “good enough,” it deserves Sashco. Made for logs. Made to last. Made to make your neighbors jealous.
Why Your Log Home Isn’t a Canvas
Ok, log home lovers, time to be real. Owning a log home is a dream. Come on, the character, the warmth, the charm, there’s nothing like it. But let’s be honest, maintenance can feel like a full-time job. And at some point, most of us have thought, “Maybe I should just paint it and be done with all this upkeep.”(Ahem. Every professional log applicator likely experienced an eye twitch after reading that.)
What do ladders, sandpaper, and love have in common? For Joseph Smidt and his family, they were the unlikely trio behind a complete log home restoration and transformation. Read the full “Restoration Possible” story and hear every step, challenge, and triumph along the way.
What do ladders, sandpaper, and love have in common? For Joseph Smidt and his family, they were the unlikely trio behind a complete log home restoration and transformation. Read the full “Restoration Possible” story and hear every step, challenge, and triumph along the way.
What do ladders, sandpaper, and love have in common? For Joseph Smidt and his family, they were the unlikely trio behind a complete log home restoration and transformation. Read the full “Restoration Possible” story and hear every step, challenge, and triumph along the way.
Don’t compromise at the end of a long and arduous journey by using an inferior stain not designed for logs. Capture and Cascade deliver performance worthy of the journey that got you here.
Moves with your logs and timbers
Won't hide the wood grain
Easy clear coat maintenance with Cascade(R) exterior clear coat
Backer Materials that Seal Things Right the First Time Backer Rod, Grip Strip, and Log Gap Cap all help you create the ideal joint desing for a long-lasting, durable seal
Logs are in constant dynamic motion. That's why there's Log Builder®, the sealant made for log structures. Stretches up to 500% of original size, while still maintaining tenacious adhesion to the wood.
When other chinking pulls away, Log Jam holds its seal With Log Jam chinking, you can keep the cozy feel and rustic look of a log home without compromising comfort and performance.
Easy to Use - Hard to See Keep out weather, bugs, and moisture without seeing it. Conceal disappears into the woodwork so you don't know the wood starts and the caulk begins.
It's Music to the Eyes Symphony works in harmony with the unique character of your logs and wood to reflect an atmosphere or cozy warmth and elegance while creating and scuff-resistant and durable surface that's easy to dust.
Right Color. Right Quantity. Right Now. Never run out of stain at the jobsite again. Stock exactly what you need in your truck or trailer at the jobsite.
Easy to mix
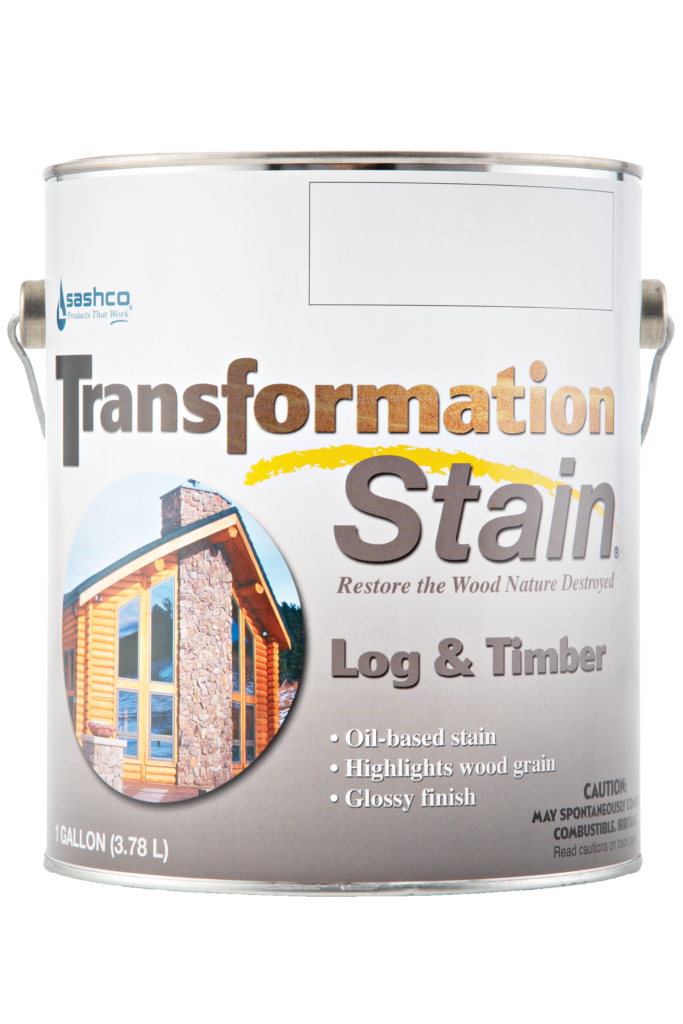
The same color, durability, and application you've come to expect from Capture Log Stain and Transformation Log & Timber
Maintenance Made Easy Now that Capture® Log Stain is applied, it’s time for Cascade® Clear Topcoat to bring out the depth and character of your unique woodgrain while protecting it against moisture, mildew, and algae. Predictable and affordable routine maintenance with Cascade throughout the years means your home stays protected and beautiful. Easy!
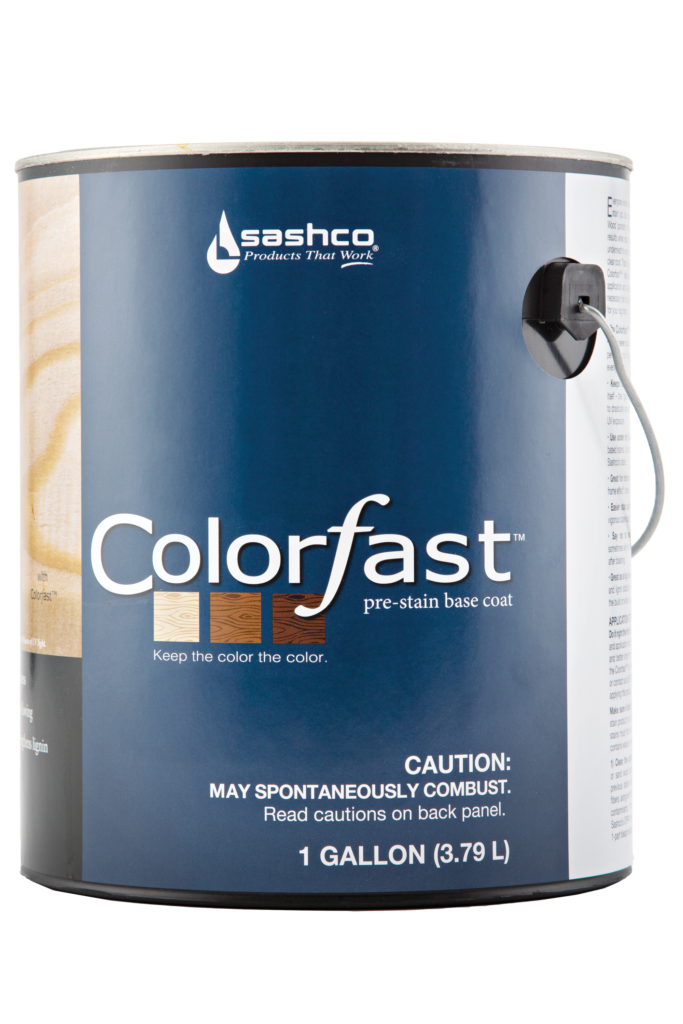
Keep the Color the Color Colorfast delivers the ideal canvas for stain application and leaves behind the strong foundation necessary for long-lasting color. It’s color confidence for your log home.
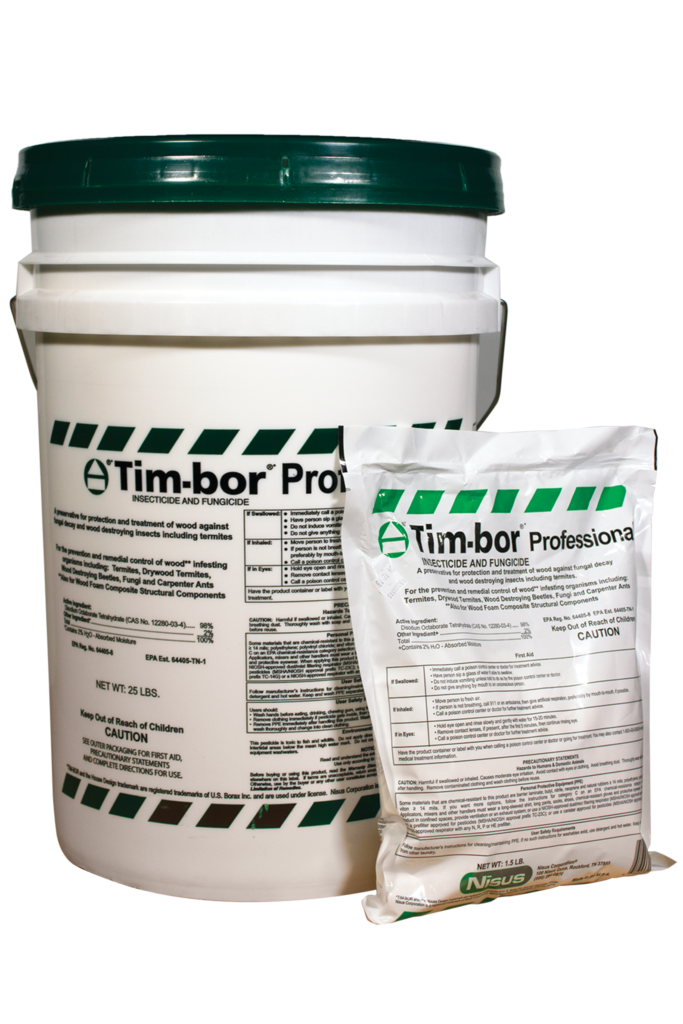
Rot, weather, insects, fungi all pose a serious threat to your logs. Protect your investment—treat your logs first to make them last. Tim-bor® helps protect your home from the costly damage caused by rot and insect infestation.
Bugs don't stand a chance
Easy to mix and apply
Prevents decay fungi
Costs 5 times less than glycol-based borate products
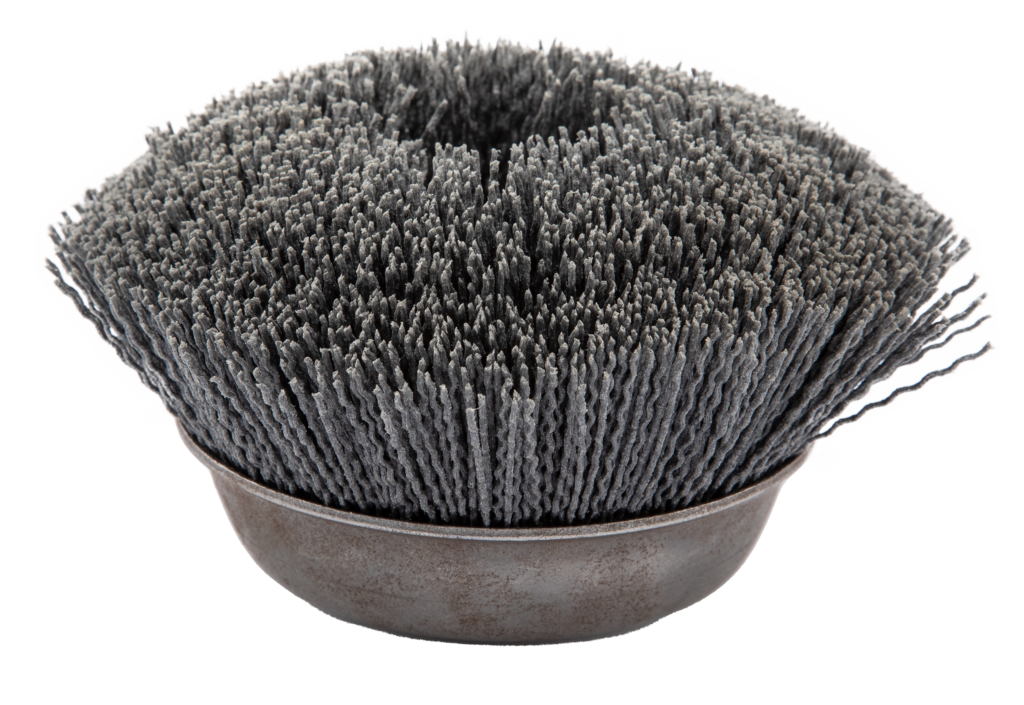
Remove Wood Felting and Raised Grain Remove wood fuzz (called felting) after power washing or media blasting, and knock down excessive raised grain with Sashco's finish sanding tools
Clean and brighten bare logs and wood, remove surface dirt, pollen, and kill mold for maintenance, and keep your logs looking fresh with CPR Log Cleaner and Brightener